 Sign in
Enreach
HeroBase → Enreach
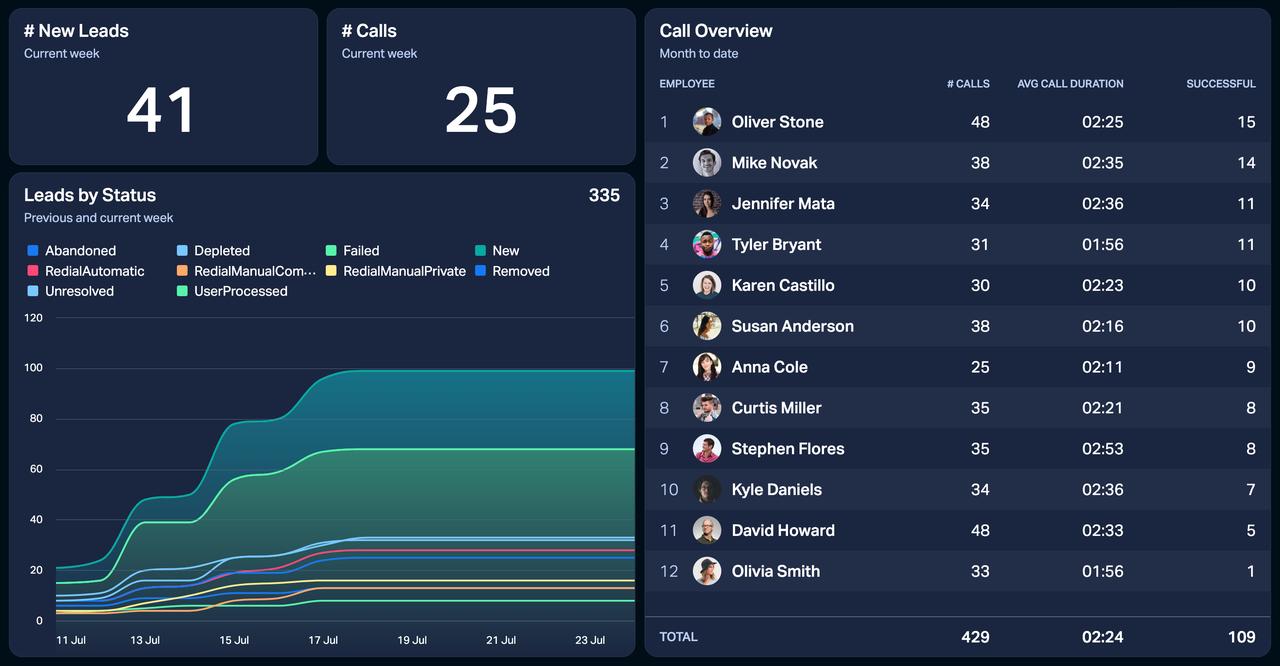
Since September 2020, HeroBase has become part of the Enreach Campaigns brand. As far as our integration goes, nothing has changed. The available data types and the connection process stay the same as before.
Step 1: Request login information from Enreach
To integrate Enreach with Plecto, you have to add the following credentials:
-
web service username
-
web service password
To get these credentials, contact Enreach support and ask for web service information. In addition, you can ask them to enable the Calendar Events endpoint for you – this will allow you to import your calendar events from Enreach to Plecto.
Once you have the credentials, move on to Step 2.
Step 2: Connect Enreach to Plecto
-
In Plecto, go to Data sources > New data source > Enreach.
-
(Optional) Rename your credentials.
-
Enter the web service username and password you received from Enreach.
-
Select an installation from the dropdown list. This represents the system URL in which you logged in in the previous step, for example, https://hero02.herobase.com/.
-
Click Next to continue.
-
Select the data you want to import and configure the settings. Here, you can change the title, choose the default date, select which fields to import, and more.
Calls: In the settings, you will see a field called Organization code. This field is not required. However, if you have multiple organizations in Enreach that use the same credentials, it can be useful to provide the org. code so Plecto imports the correct data.
-
Click Next to choose how much data to import and how long you want to keep it in the data source.
-
Click Import to finish.
Available data
You can import the following data from your Enreach account to Plecto:
Update frequency: 2m
Supports custom fields? No
Supports webhooks? No
Supports automatic registration deletion? No
Supports relations? No
Update frequency: 2m
Default member field: user
Default date field: startTime
Supports custom fields? No
Supports webhooks? No
Supports automatic registration deletion? No
Supports relations? No
Update frequency: 2m
Default member field: user
Default date field: startTime
Supports custom fields? No
Supports webhooks? No
Supports automatic registration deletion? No
Supports relations? No
Update frequency: 2m
Default member field: firstProcessedByUser
Default date field: firstProcessedTime
Supports custom fields? Yes
Supports webhooks? No
Supports automatic registration deletion? No
Supports relations? No
Update frequency: 2m
Supports custom fields? No
Supports webhooks? No
Supports automatic registration deletion? No
Supports relations? No
To get this data, you will have to contact Enreach support and ask them to allow you to call the Calendar Events endpoint. The automatic imports in Plecto will run from the last hour to next 60 days, which allows you to import all upcoming events for the next 2 months as well as cover any updates (changes, cancellations) within the past hour.
Update frequency: 15m
Supports custom fields? No
Supports webhooks? No
Supports automatic registration deletion? No
Supports relations? No
Custom field import
To see all your data, you have to run a manual data import. Follow the steps below:
-
Open your data source settings, then click Import more data.
-
Select a time period and click Start import. Plecto will import your data along with custom fields.
-
You can now see all the available data source fields in the section Fields in the data source settings. Select which fields you want to show in your data source, then click Save. Plecto will add these fields to the data source view.
-
Since the newly-added fields are still empty, you need to run another manual import. Go back to the data source settings and repeat Steps 1 and 2.
You will now see all data related to the custom fields in your data source. 💪
Custom field format
If you need to use a field as a number in Plecto, please contact our support team – they can change the field type for you. We are required to handle it this way because Enreach currently does not support the concept of field types. Plecto will not automatically delete fields that have been removed from the export view, but you can always contact support if you need to remove fields.
How to import Enreach Reports to Plecto
If you want to import data from your Enreach Reports, you need to copy-paste the Report API Request (or "payload") from your Enreach console into Plecto when you create a new Plecto data source.
Enreach says the easiest way to build the API request is to make the report in the UI and then copy from the console:
-
Open Network
-
Open a report you want to get the numbers from
-
Click Calculate
-
Choose the bottom one and click Request
-
Copy the string
Here's an example of how the string could look like (unformatted):
{"name":"","rowSegmentations":[{"excludeIfNoValues":true,"users":{"userUniqueIds":[],"includeInactive":true}}],"columns":[{"workSchedulePlannedTasks":{"type":"TimeTotal","header":"Scheduled login"}},{"postProcess":{"predefined":"ContactTimeTotal","header":"Login "}},{"customColumn":{"customColumnUniqueId":"MRCCD2E2206","header":"Utilization"}},{"customColumn":{"customColumnUniqueId":"MRCCD3E2206","header":"Talktime"}},{"customColumn":{"customColumnUniqueId":"MRCCD4E2206","header":"Wrap-up"}},{"customColumn":{"customColumnUniqueId":"MRCCD5E2206","header":"Dial-up"}},{"customColumn":{"customColumnUniqueId":"MRCCD6E2206","header":"Preparation"}},{"customColumn":{"customColumnUniqueId":"MRCCD7E2206","header":"AHT"}},{"customColumn":{"customColumnUniqueId":"MRCCD8E2206","header":"CPH"}}],"criteria":[{"time":{"type":"Days","offset":0,"count":1,"customTimeFrom":null,"customTimeTo":null}},{"excludeIfNoValues":true,"organization":{"organizationalUnitUniqueIds":["OU1139E2206"]}},{"excludeIfNoValues":true,"campaigns":{"campaignUniqueIds":["CAMP12707E2206","CAMP12726E2206","CAMP12733E2206","CAMP12734E2206","CAMP12764E2206","CAMP12765E2206","CAMP12766E2206","CAMP12767E2206","CAMP12812E2206","CAMP12813E2206","CAMP12814E2206","CAMP12930E2206","CAMP12932E2206","CAMP12934E2206","CAMP12936E2206","CAMP12937E2206","CAMP12938E2206","CAMP12939E2206","CAMP12940E2206","CAMP13092E2206","CAMP13093E2206","CAMP13094E2206","CAMP13095E2206","CAMP13096E2206","CAMP13097E2206","CAMP13098E2206","CAMP13099E2206","CAMP13207E2206","CAMP14135E2206","CAMP14137E2206","CAMP14138E2206","CAMP14139E2206","CAMP15110E2206","CAMP16016E2206","CAMP17406E2206","CAMP17407E2206","CAMP17408E2206","CAMP17409E2206","CAMP17410E2206"],"projectUniqueIds":[],"includeInactive":true}}]}
We currently support only daily reports, and your data will update with the same frequency as all other data types (every 2 minutes).
Known issues and workarounds
Issue #1: Total call duration does not match results in Enreach
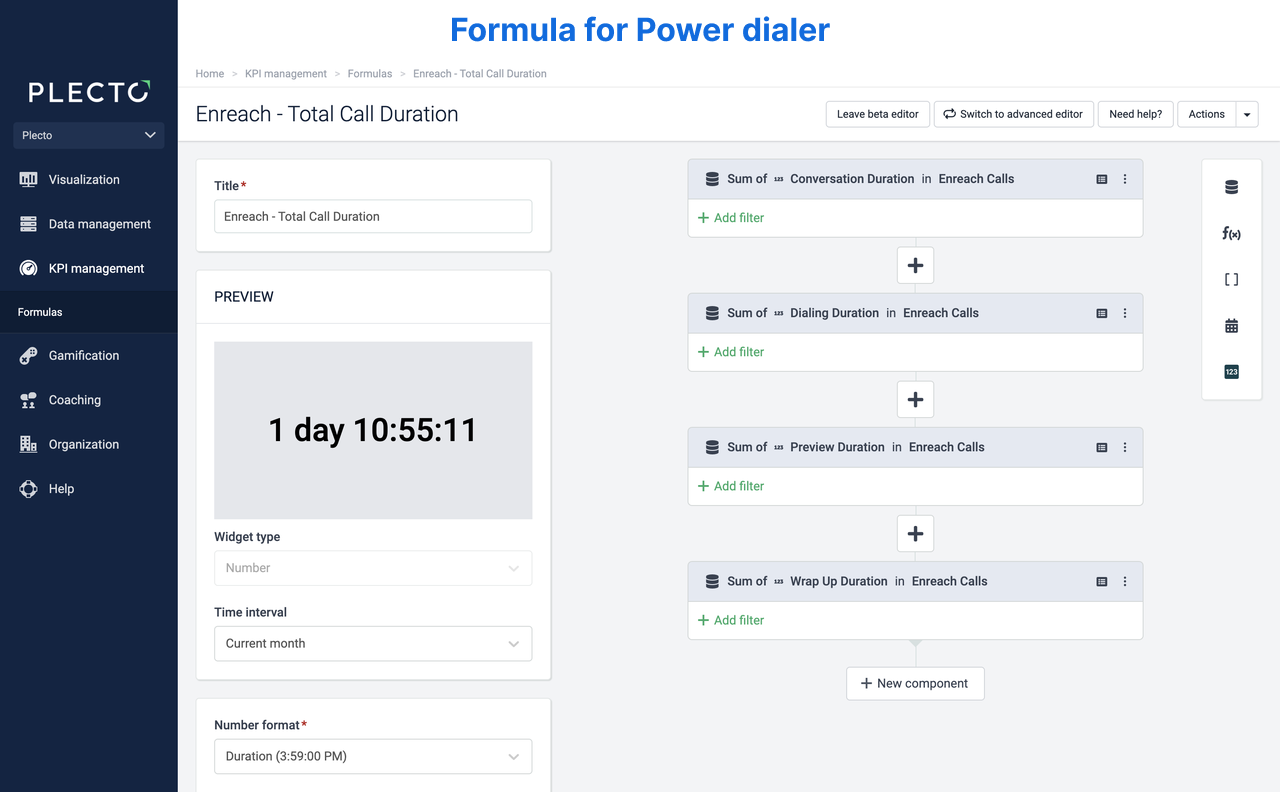
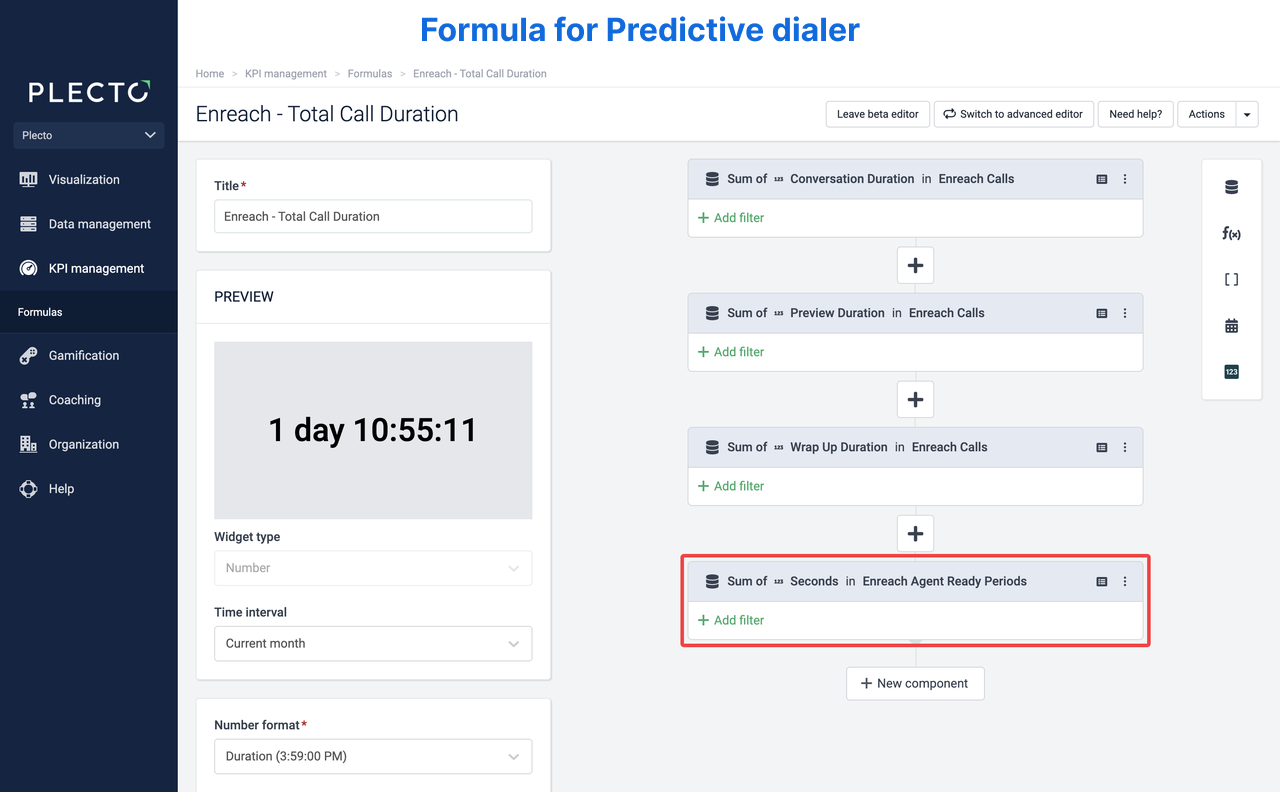
Sometimes, the total call duration in Plecto doesn't match the results in Enreach – that's because of the dialing time. The formulas you need to build in Plecto depend on whether you use the power or predictive dialer in Enreach.
Power dialer
Use the Calls data source to calculate the total call duration. The formula will look like the following (data sources are shown in parentheses). Change the number format to Duration.
Conversation Duration (Calls) + Dialing Duration (Calls) + Preview Duration (Calls) + Wrap Up Duration (Calls)
Predictive dialer
Combine data from both the Calls and Agent Ready Periods data sources to calculate the total call duration. The formula will look like the following (data sources are shown in parentheses). Change the number format to Duration.
Conversation Duration (Calls) + Preview Duration (Calls) + Wrap Up Duration (Calls) + Seconds (Agent Ready Periods)
Importing Leads from Enreach
As of March 2024, we are importing Leads from Simple leads endpoint, which means that adding new Leads data sources doesn't require additional steps.
***
Legacy Leads
Here below is described the legacy way of configuring Enreach to get the Leads data into Plecto:
You can manually select projects and campaigns to send from Enreach to Plecto. If you do not select any projects or campaigns, Plecto will import all of them by default.
-
Open Enreach and log in with your username and password.
-
Go to Organization > Log In As Another User. Click Plecto_API_USER to log in.
Choose the right login. It is important that you log in as the Plecto API User. If not, Plecto will not be able to import the data related to your projects and campaigns.
-
Go to Leads > Lead Admin. You can see the lead export search name
api_import_exportunder My custom views. This is where Plecto gets the data about your leads. If you want to only select specific projects to export to Plecto, click Projects, Campaigns, and Lead Pools and select the projects and fields you want to send to Plecto. -
Click on the section Columns. Here, you select the fields you want to export, and Plecto will fetch data from the selected fields.
-
Click Save to finish.