 Sign in
Creatio
Step 1: Get your credentials from Creatio
To integrate your Creatio data with Plecto, you need to provide a Client ID, Client Secret, and your Creatio subdomain.
To get your Client ID and Secret:
-
In Creatio, click the gear icon in the top right to open Settings.
-
Find the Import and integration section and go to OAuth 2.0 integrated applications.
-
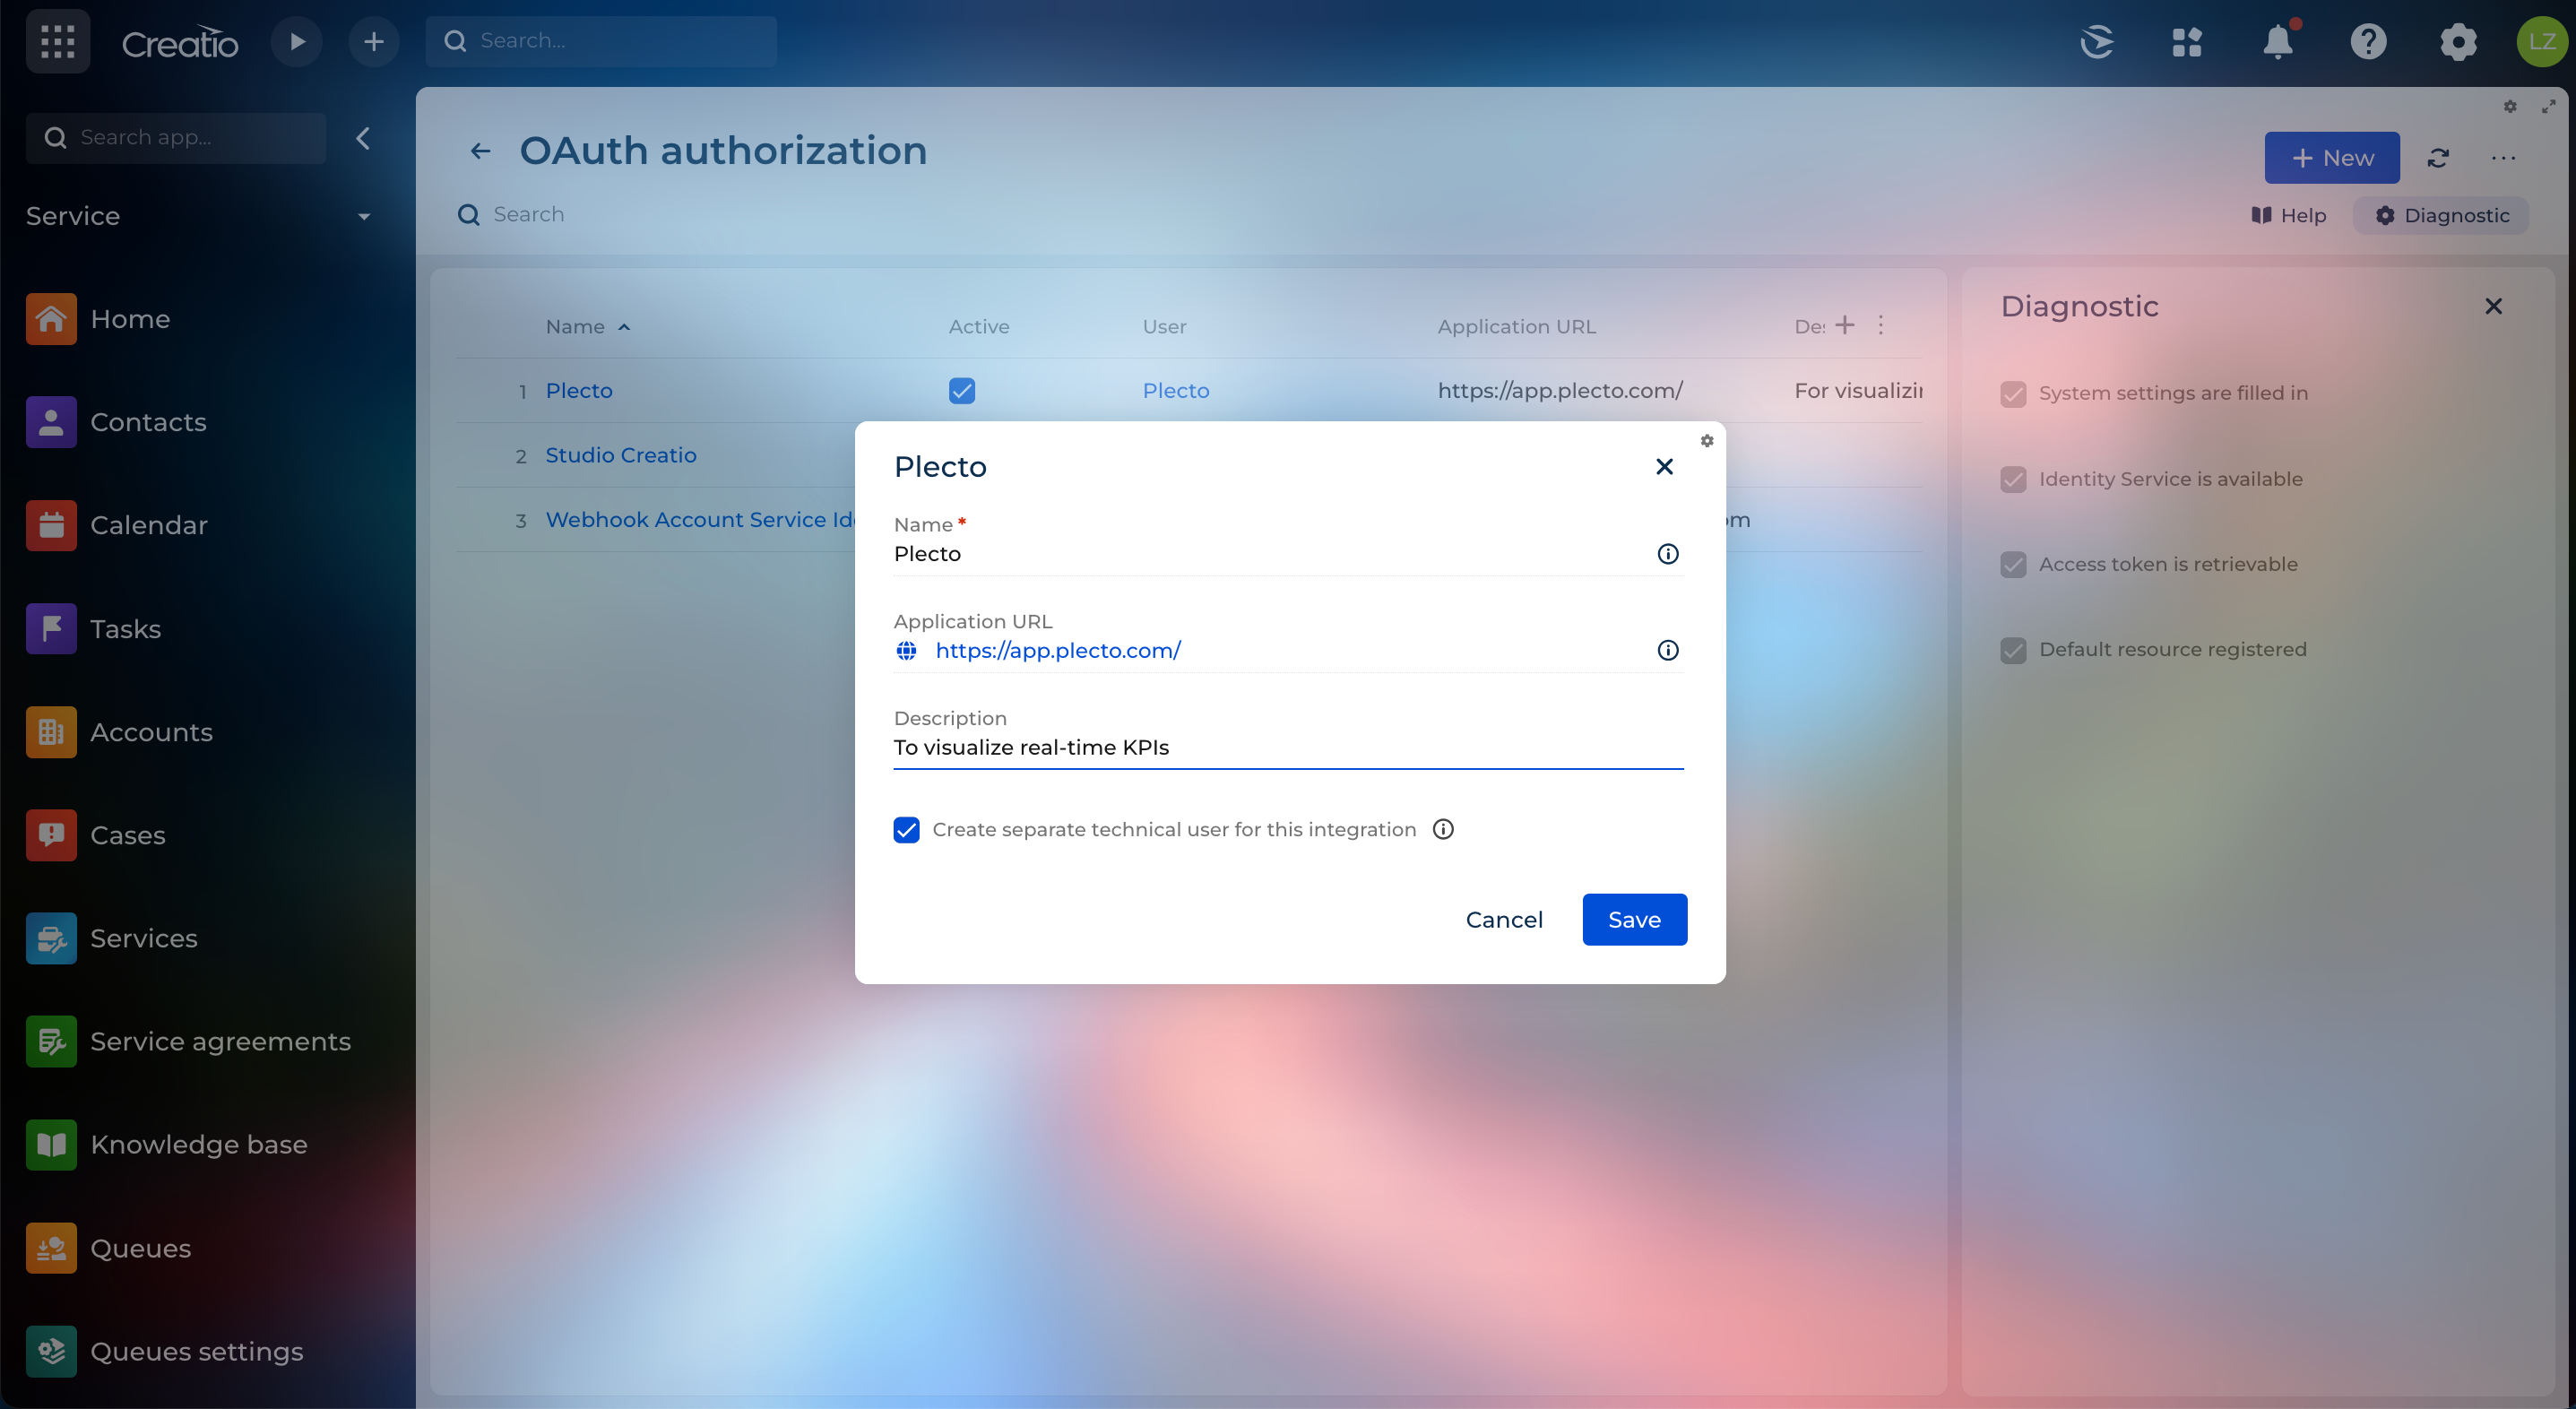
On the right, click the Diagnostic tab and make sure all the options are enabled.
-
Now, click New in the top-right corner and fill out the required information:
-
Name (for example, Plecto)
-
Application URL (optional; for example, https://app.plecto.com/)
-
Description (optional)
-
Leave the Create a separate technical user for this integration option enabled. You will have to set up the technical user's permissions in Step 2.
You don't have to create a technical user, but if you don't, a user with admin account will have to integrate with Plecto, which has more permissions than we need - Plecto only needs to read your data, therefore, creating a technical user is advised.
-
-
Click Save.
-
Creatio will generate your Client ID and Client Secret.
Copy your credentials and store them in a safe place in case you need to use them again.
-
You can find your subdomain in the URL when logged into Creatio. For example, the subdomain of the URL https://123456-crm-bundle.creatio.com/ is 123456-crm-bundle
-
Move to Step 2 and configure the Creatio technical user permissions.
Step 2: Configure the technical user permissions in Creatio
If you chose to create a technical user in Creatio to integrate with Plecto, you have to give it a couple of permissions:
-
Access to OData
-
View any data
To configure these permissions:
-
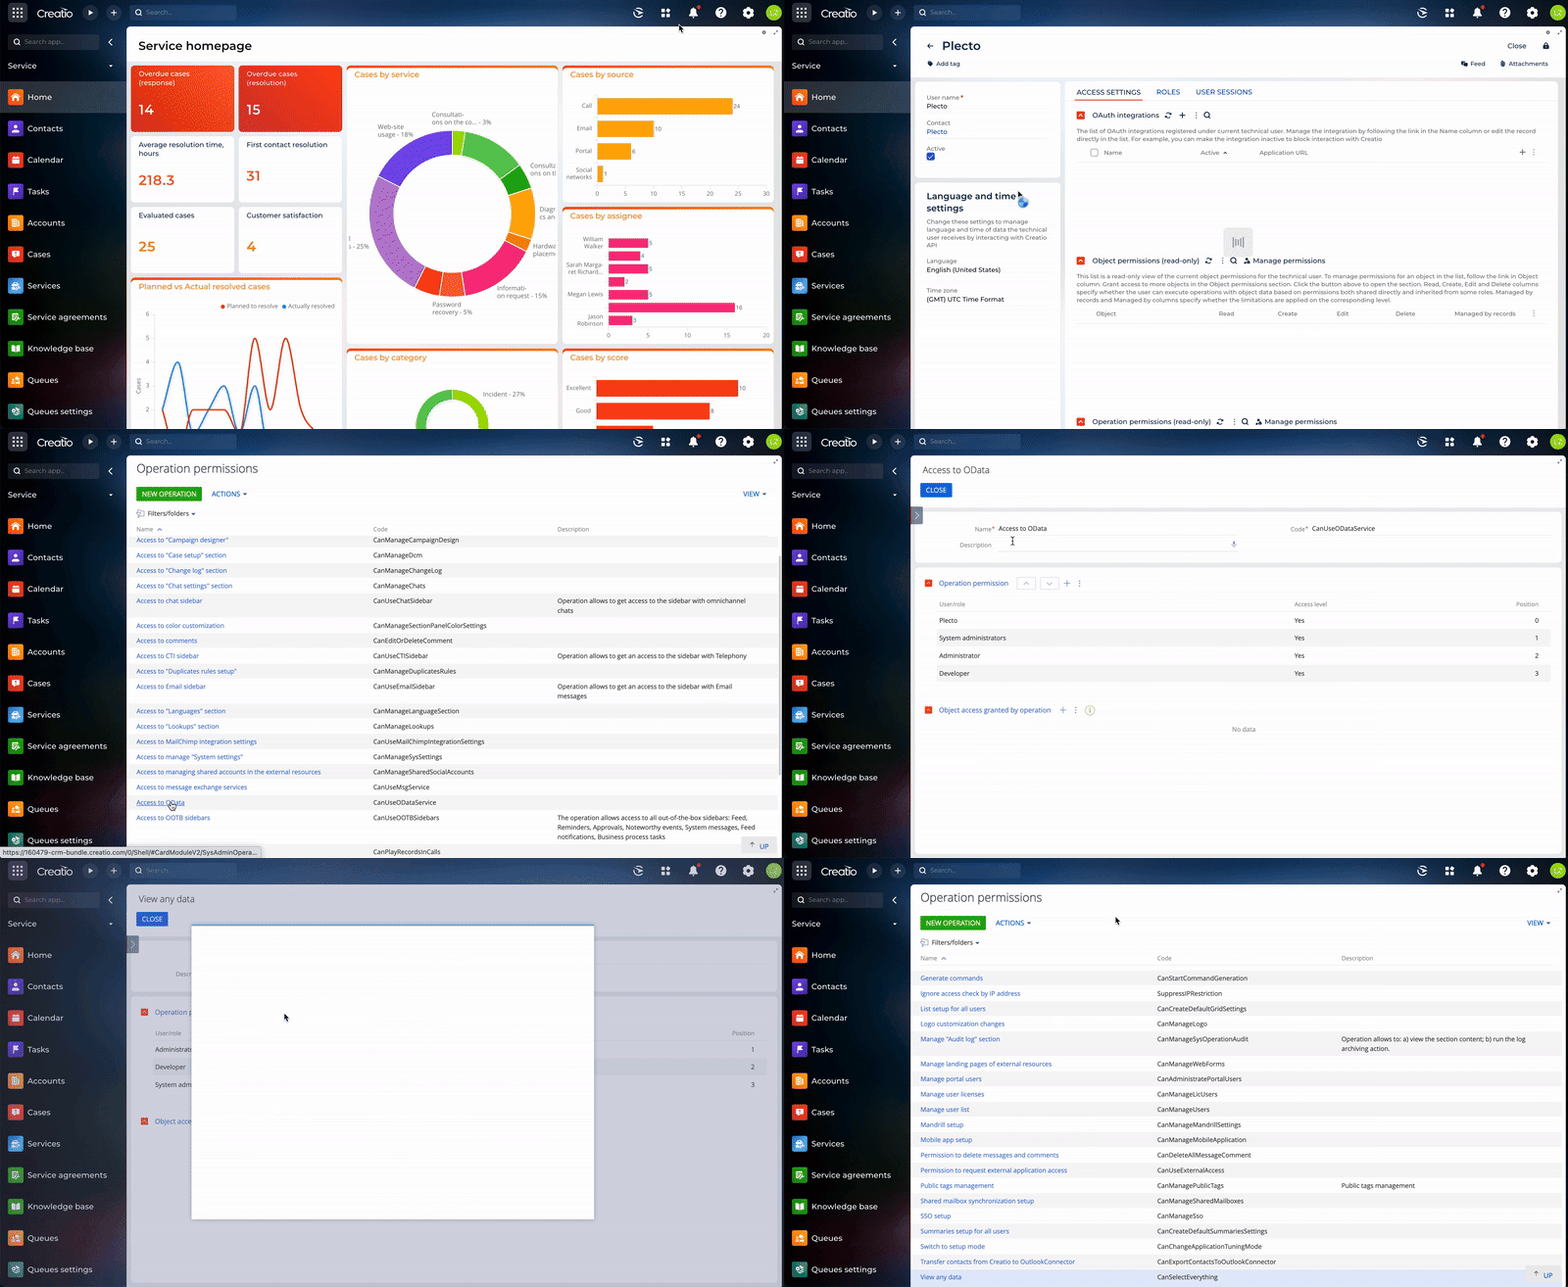
In Creatio, go to Settings > Technical users and select the Plecto user.
-
Find the Operation permissions section and click Manage permissions. A new tab will open.
-
Find and open Access to OData.
-
Click the plus icon next to the Operation permission heading, find the Plecto technical user and click SELECT.
-
Click CLOSE in the top-left.
-
Now, scroll to the bottom and open View any data.
-
Follow the same process - click the plus icon, find the technical user, click SELECT, then CLOSE.
-
Your technical user permissions are now configured. Move on to Step 3.
Step 3: Integrate Creatio with Plecto
-
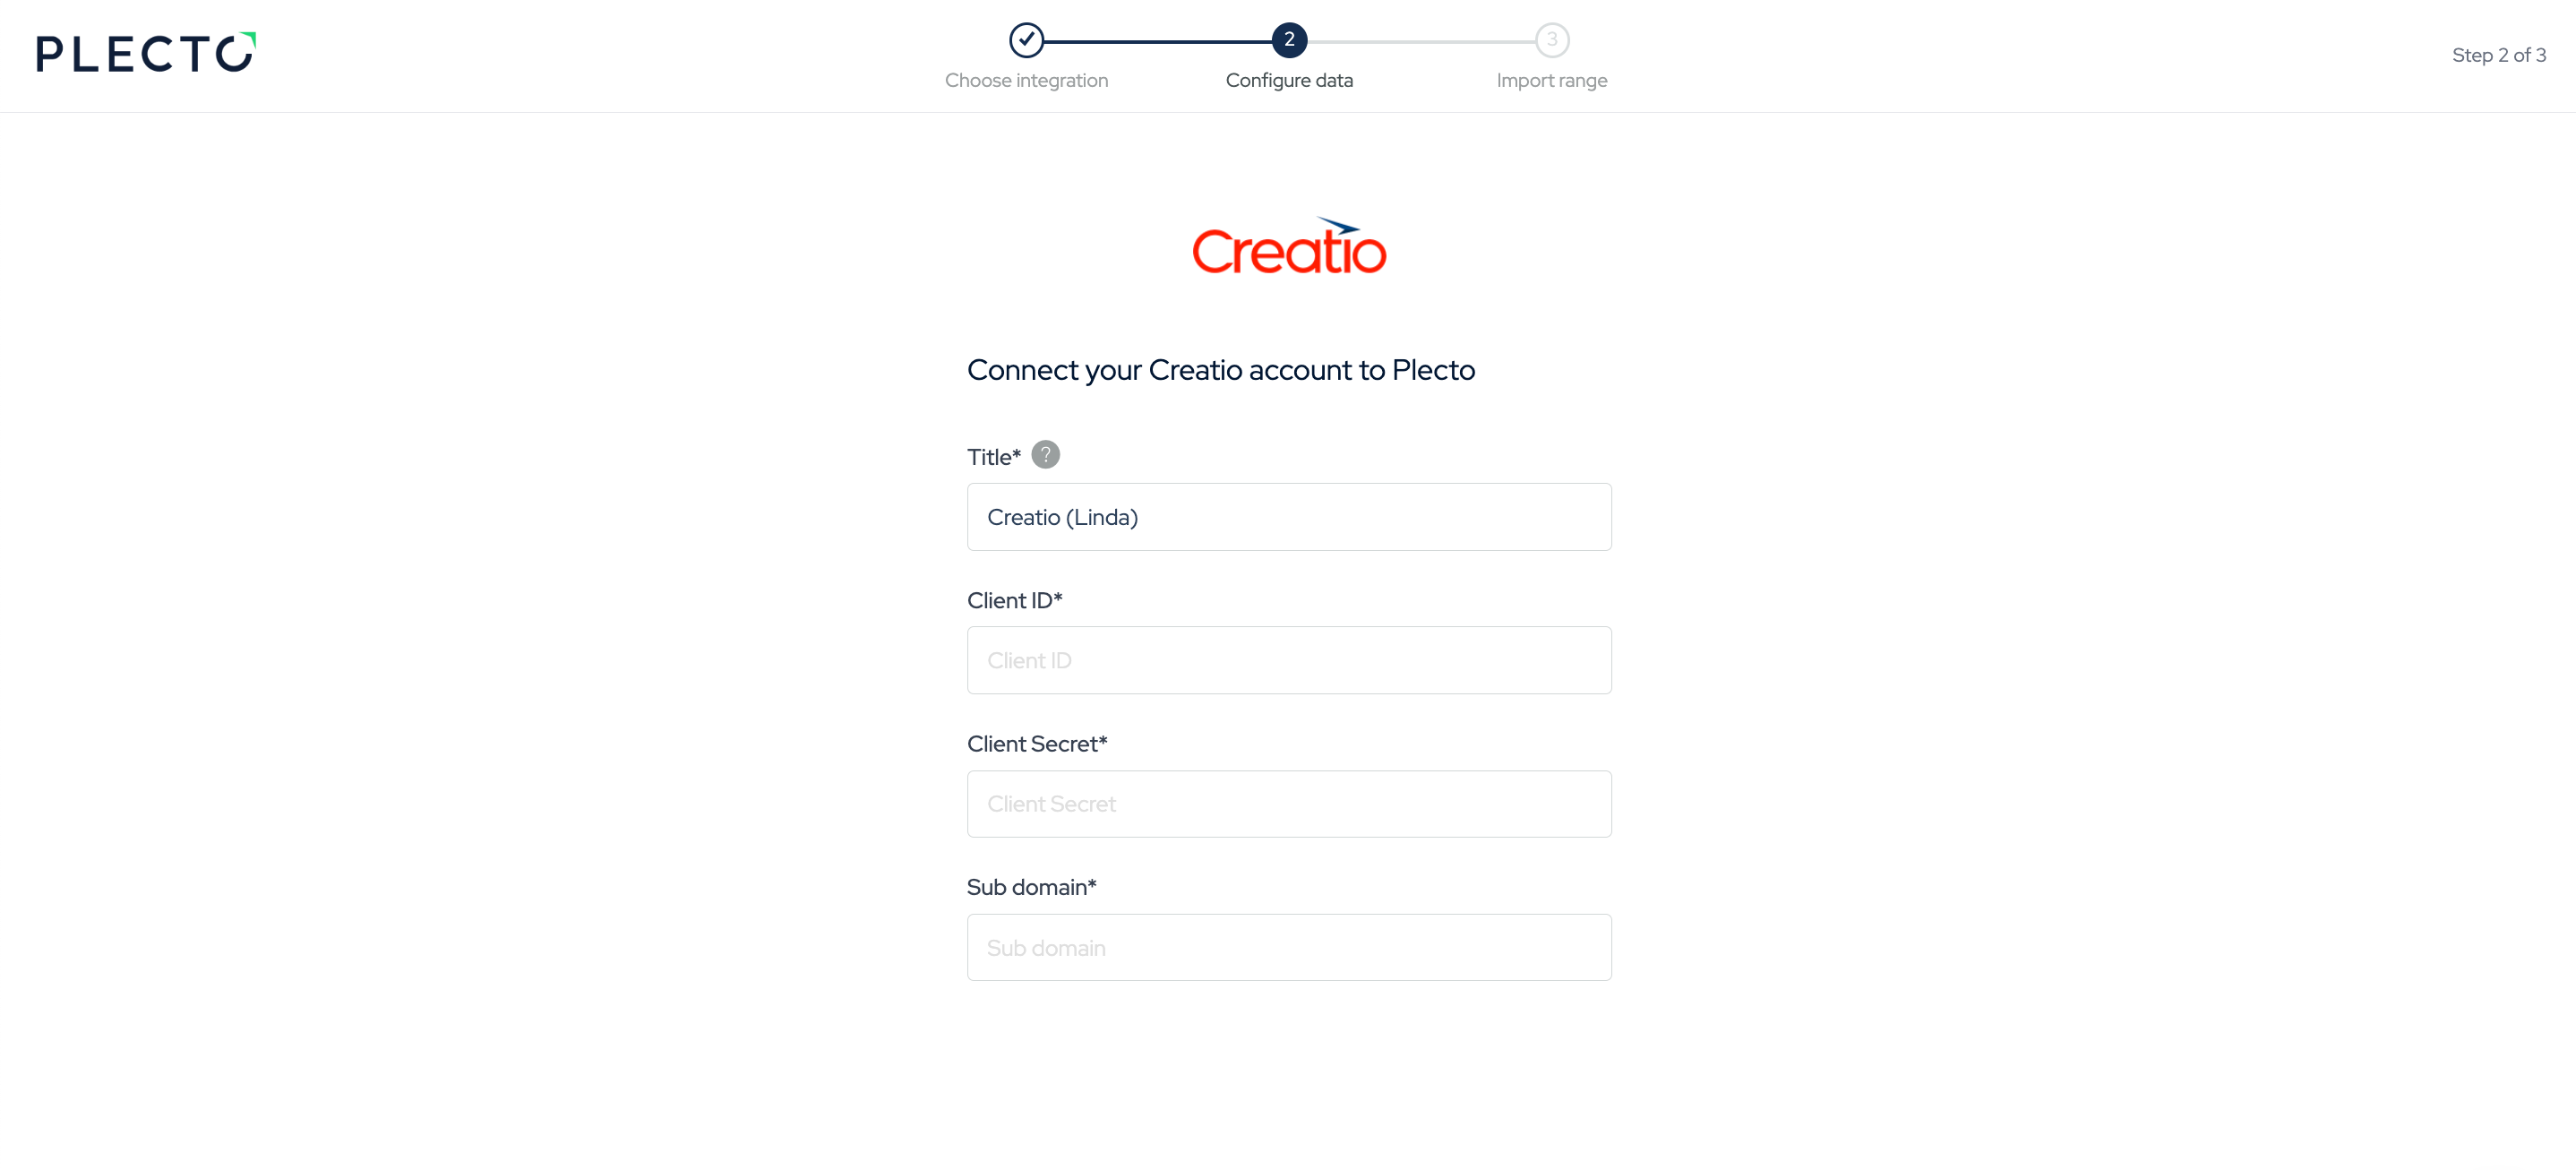
In Plecto, go to Data sources > New data source > Creatio.
-
(Optional) Rename your credentials.
-
Insert your Creatio Client ID, Client Secret, and Subdomain. Click Next.
-
Select the data you want to import.
-
Configure your data source settings. Here, you can change the title, choose the default date, select which fields to import, and more.
-
Click Next to choose how much data to import and how long you want to keep it in the data source.
-
Click Import to finish.
Available data
Our integration with Creatio currently allows you to import the following data:
Update frequency: 20m
Supports custom fields? No
Supports webhooks? No
Supports automatic registration deletion? No
Supports relations? No
Update frequency: 2m
Supports custom fields? No
Supports webhooks? No
Supports automatic registration deletion? No
Supports relations? Yes
Update frequency: 1h
Supports custom fields? No
Supports webhooks? No
Supports automatic registration deletion? No
Supports relations? No
Update frequency: 2m
Supports custom fields? No
Supports webhooks? No
Supports automatic registration deletion? No
Supports relations? Yes
Update frequency: 20m
Supports custom fields? No
Supports webhooks? No
Supports automatic registration deletion? No
Supports relations? Yes
Update frequency: 24h
Supports custom fields? No
Supports webhooks? No
Supports automatic registration deletion? No
Supports relations? Yes