Sign in
Set up SSO for Plecto and Okta
Step 1: Retrieve the Assertion Consumer Service (ACS) URL from Plecto
To enable Single Sign-On (SSO) in Plecto using Okta, you'll need to configure both Okta and Plecto to communicate via the SAML 2.0 protocol.
Here's a step-by-step guide to set up the integration:
-
Log in to your Plecto account.
-
Navigate to the Settings section.
-
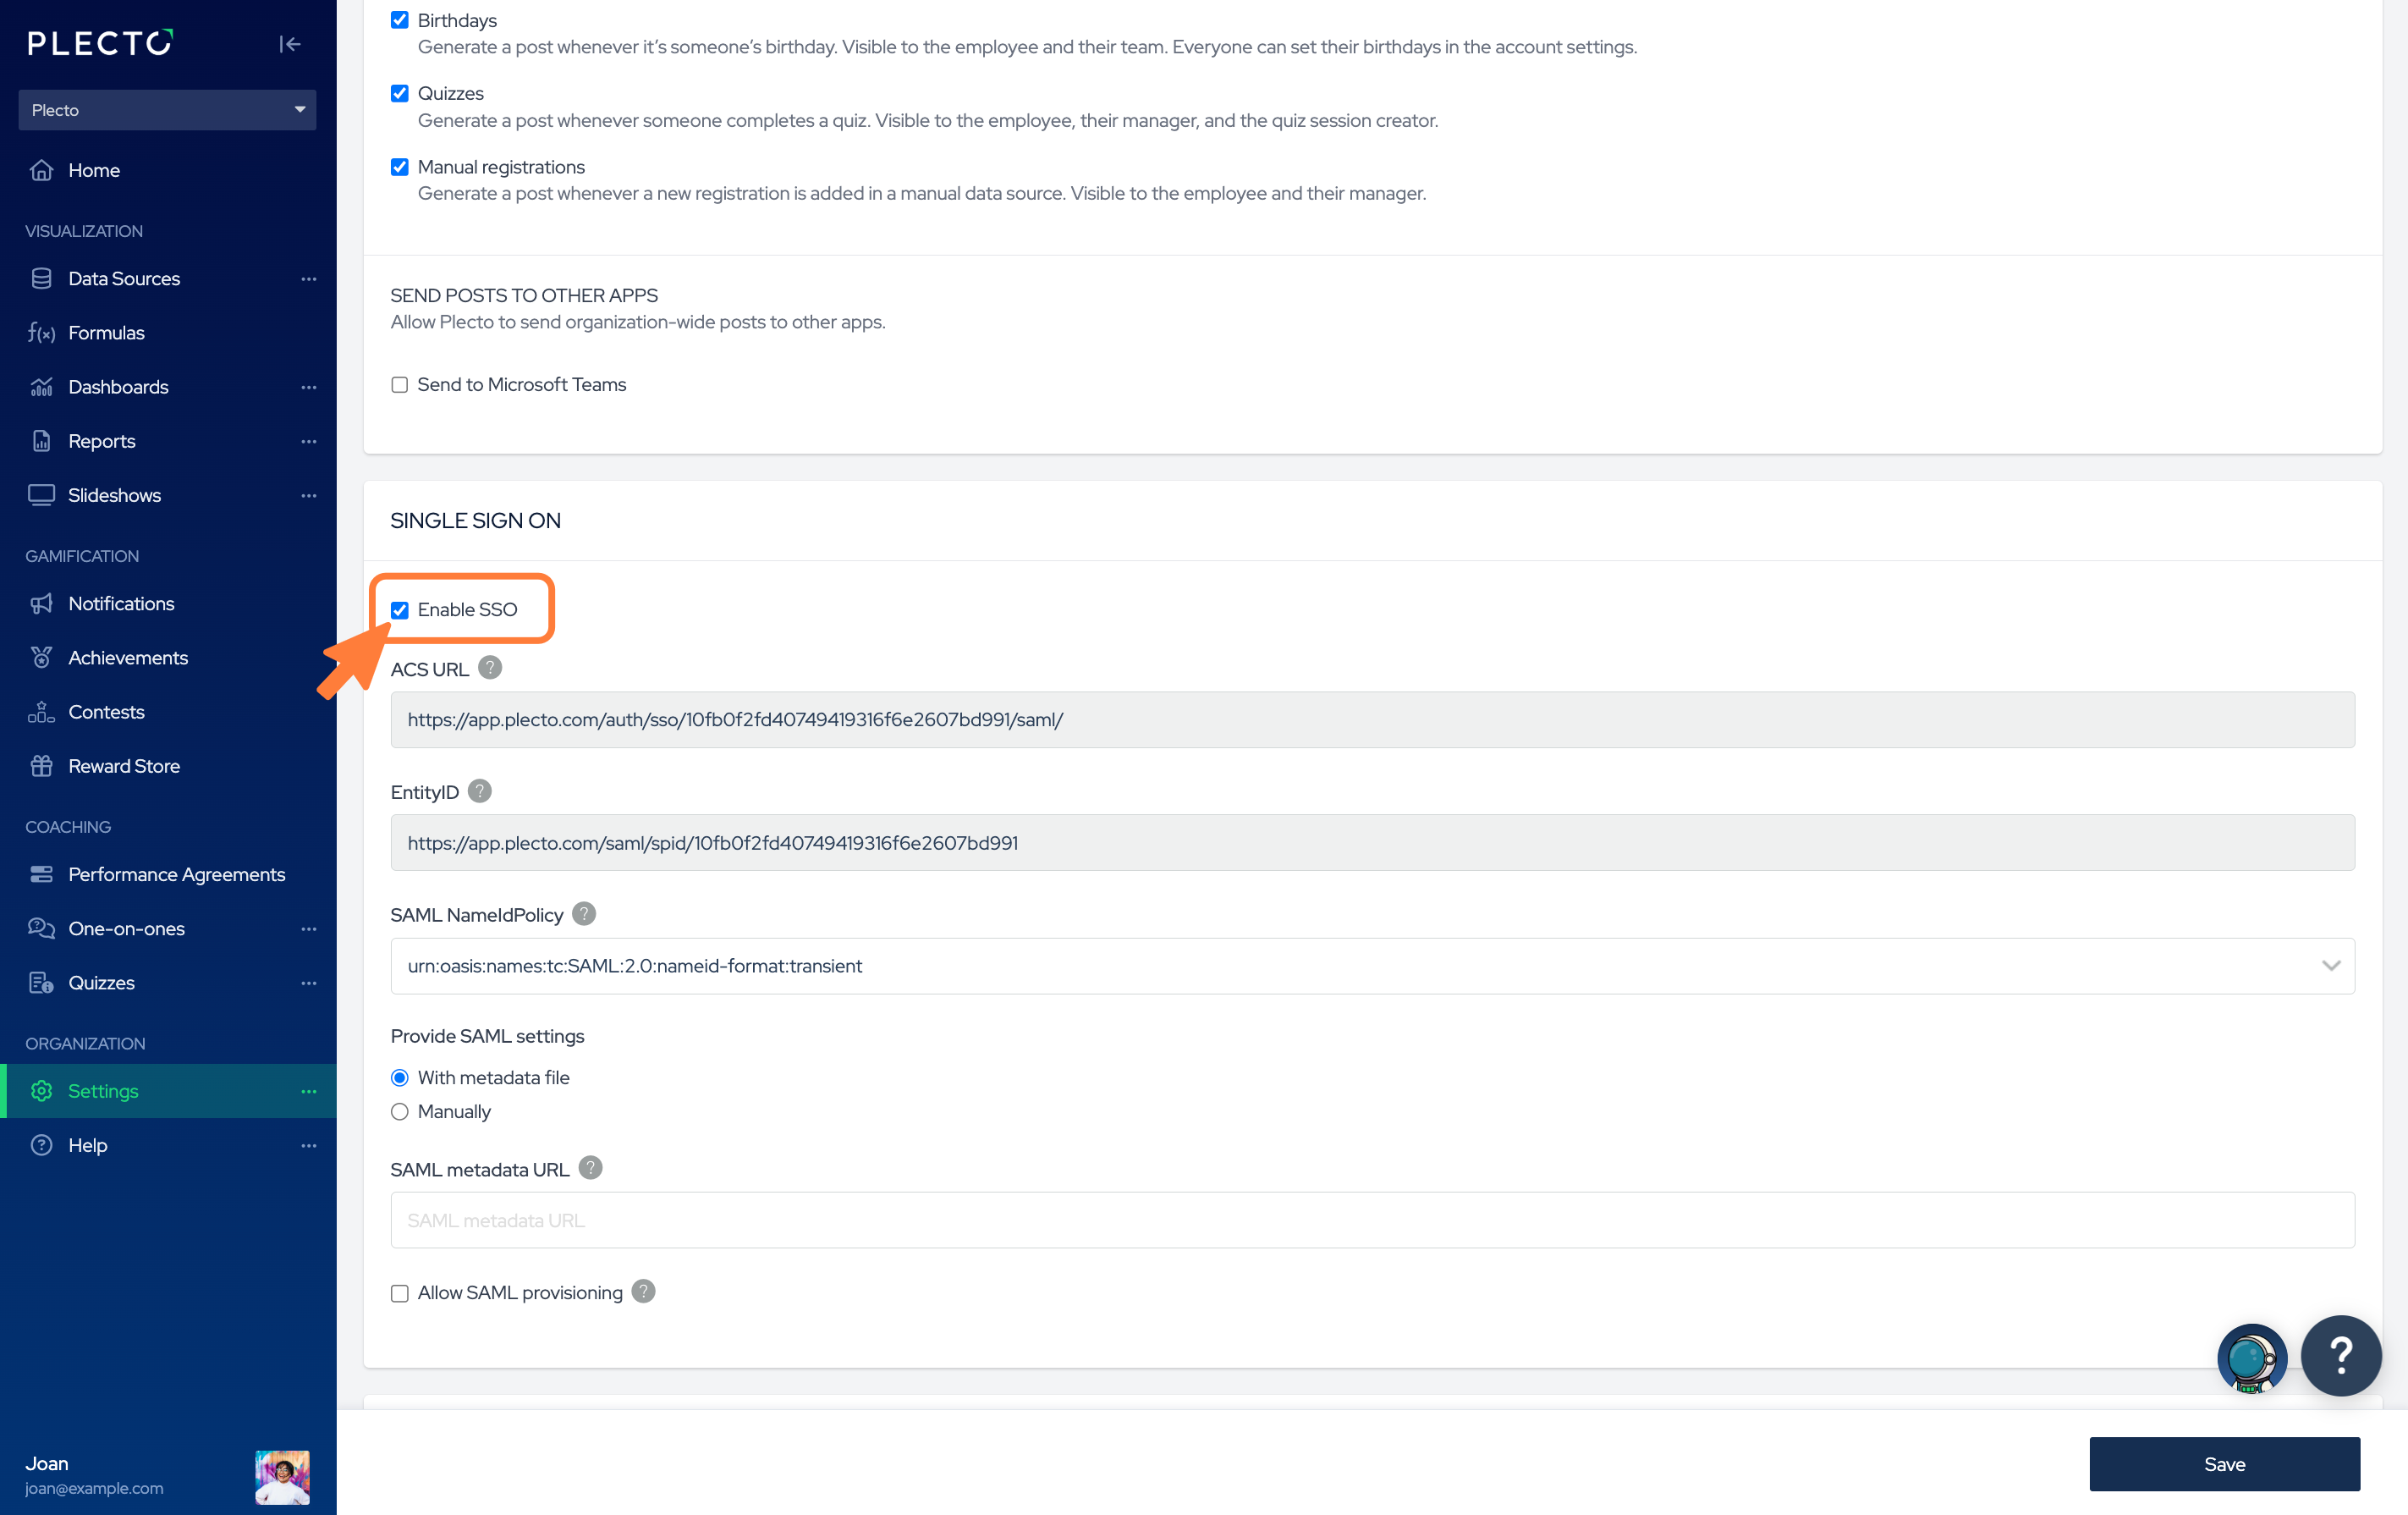
Check the box labeled Enable SSO.
-
Copy the ACS URL provided; you'll need this for the Okta configuration.
-
In a separate browser tab, open your Okta Admin Console.
Step 2: Configure SAML Application in Okta
-
Log in to your Okta Admin Console.
-
Go to the Applications tab and click on Create App Integration.
-
Click on Create New App.
-
In the dialog:
-
Set the Platform to Web.
-
Choose SAML 2.0 as the Sign on method.
-
Click Create.
-
-
In the General Settings:
-
Enter an appropriate App name (e.g., "Plecto").
-
Click Next.
-
-
In the Configure SAML step:
-
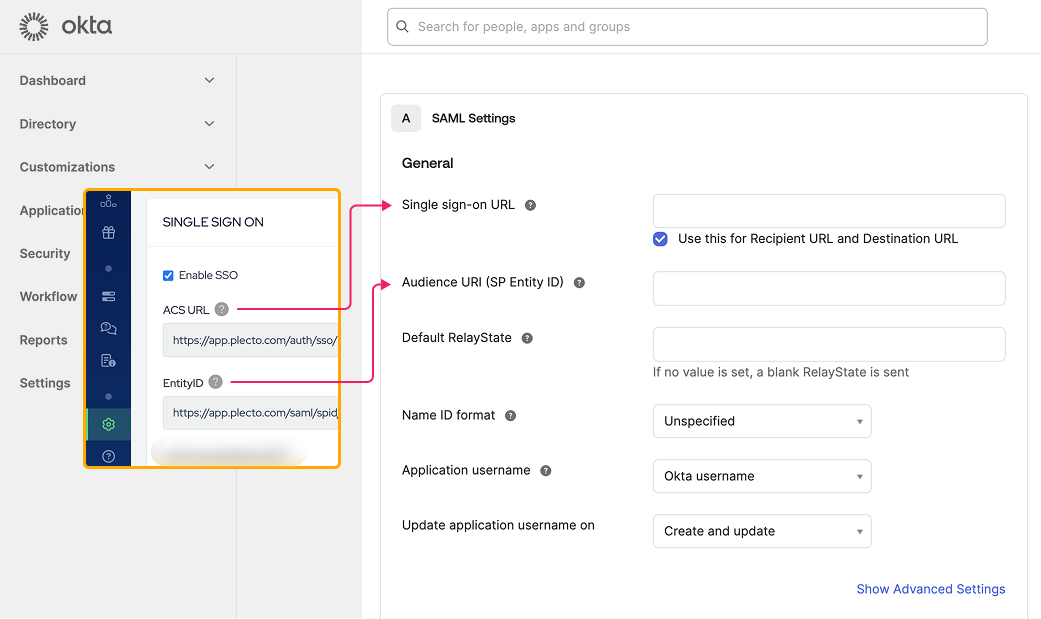
Set the Single Sign-On URL to the ACS URL you obtained from Plecto.
-
Set the Audience URI (SP Entity ID) to a unique identifier for Plecto (consult Plecto's documentation or support for the correct value).
-
Set the Name ID format to EmailAddress.
-
-
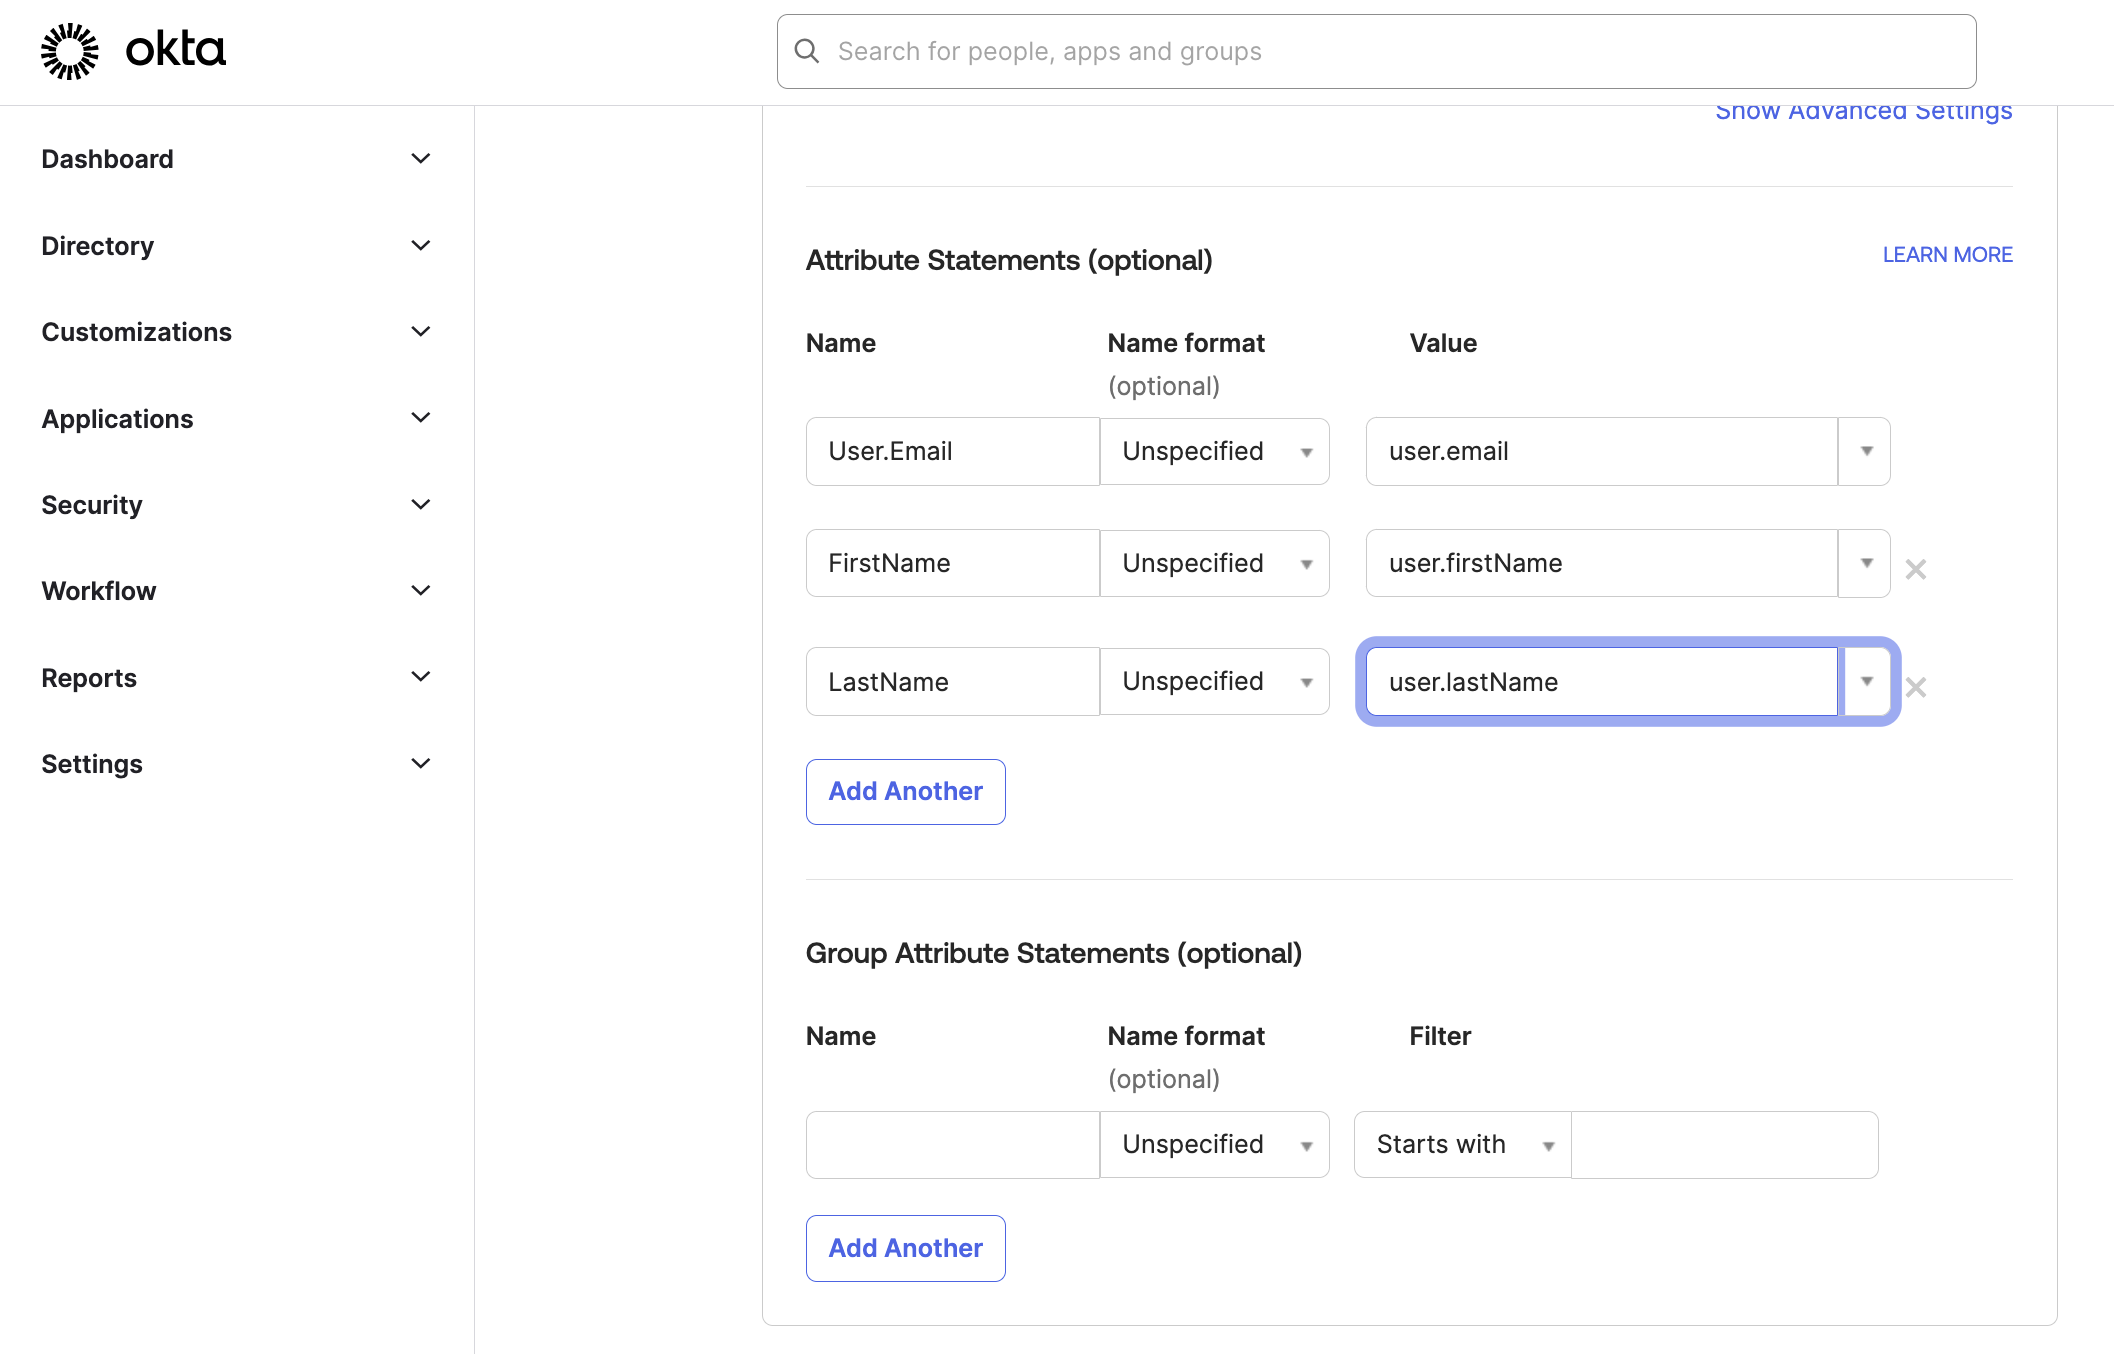
(Optional) Update the Attribute Statements section. The attributes are linked to the user variables defined in a user under Directory > Profile editor. Learn more in Okta's help documentation.
-
Click Next.
-
(Optional) Leave Feedback to Okta.
-
Click Finish.
-
After creating the app, go to the Sign On tab and click on View SAML setup instructions.
-
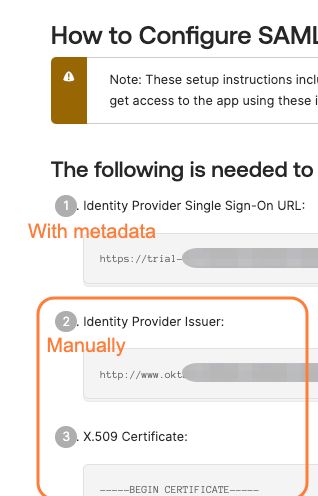
Note down the Identity Provider Single Sign-On URL, Identity Provider Issuer, and download the X.509 Certificate; you'll need these for Plecto.
-
Now go back to Plecto and follow Step 3.
Step 3: Configure SSO in Plecto
-
Return to Plecto's Settings section.
-
Ensure the Enable SSO option is checked.
-
Under Provide SAML settings, you have two options:
-
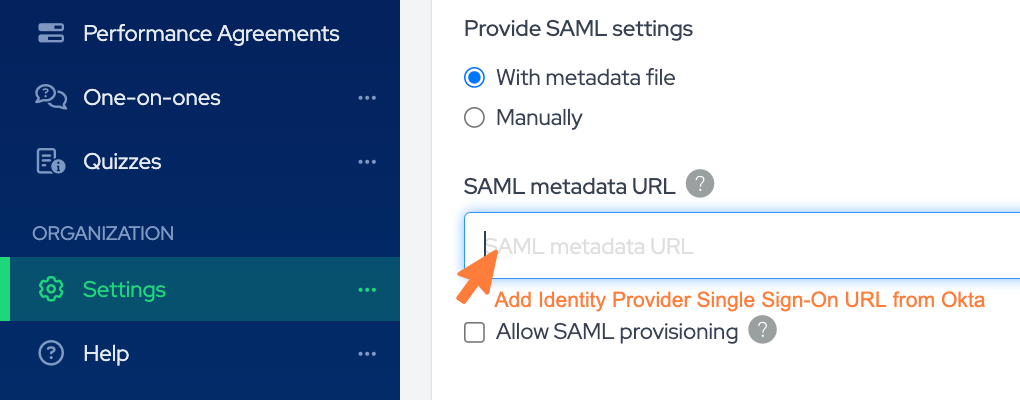
Provide settings With metadata file: Enter the SAML metadata URL from Okta. This is typically the Identity Provider Single Sign-On URL you noted earlier (listed nr. 1 in Okta).
-
Provide settings Manually:
-
SAML login URL: This would be the Identity Provider Issuer URL from Okta (listed nr. 2 in Okta).
-
SAML certificate (listed nr. 3 in Okta).
-
-
-
Optionally, enable Allow SAML provisioning to automatically create employee accounts in Plecto when they log in via SSO.
-
Click Save to finalize the configuration.