Sign in
Step 5: Invite Your Teams
Invite your teams to Plecto
| Quick Start Guides |
|---|
| Step 1: Integrate Your Data Step 2: Create Formulas Step 3: Set up Dashboards, Reports, Contests & More Step 4: Add Your Dashboards and Contests to TVs Step 5: Invite Your Teams |
Once Plecto receives data from a system, it creates new employee profiles in your organization based on the received data. These employees are managed by the external system and don't have login access to Plecto.
👉 To give your employees login access, you need to invite them to your Plecto organization.
👉 You can always create new employee profiles manually.

🚀 Getting Started: Invite Your Teams to Plecto →
How to give employees login access
-
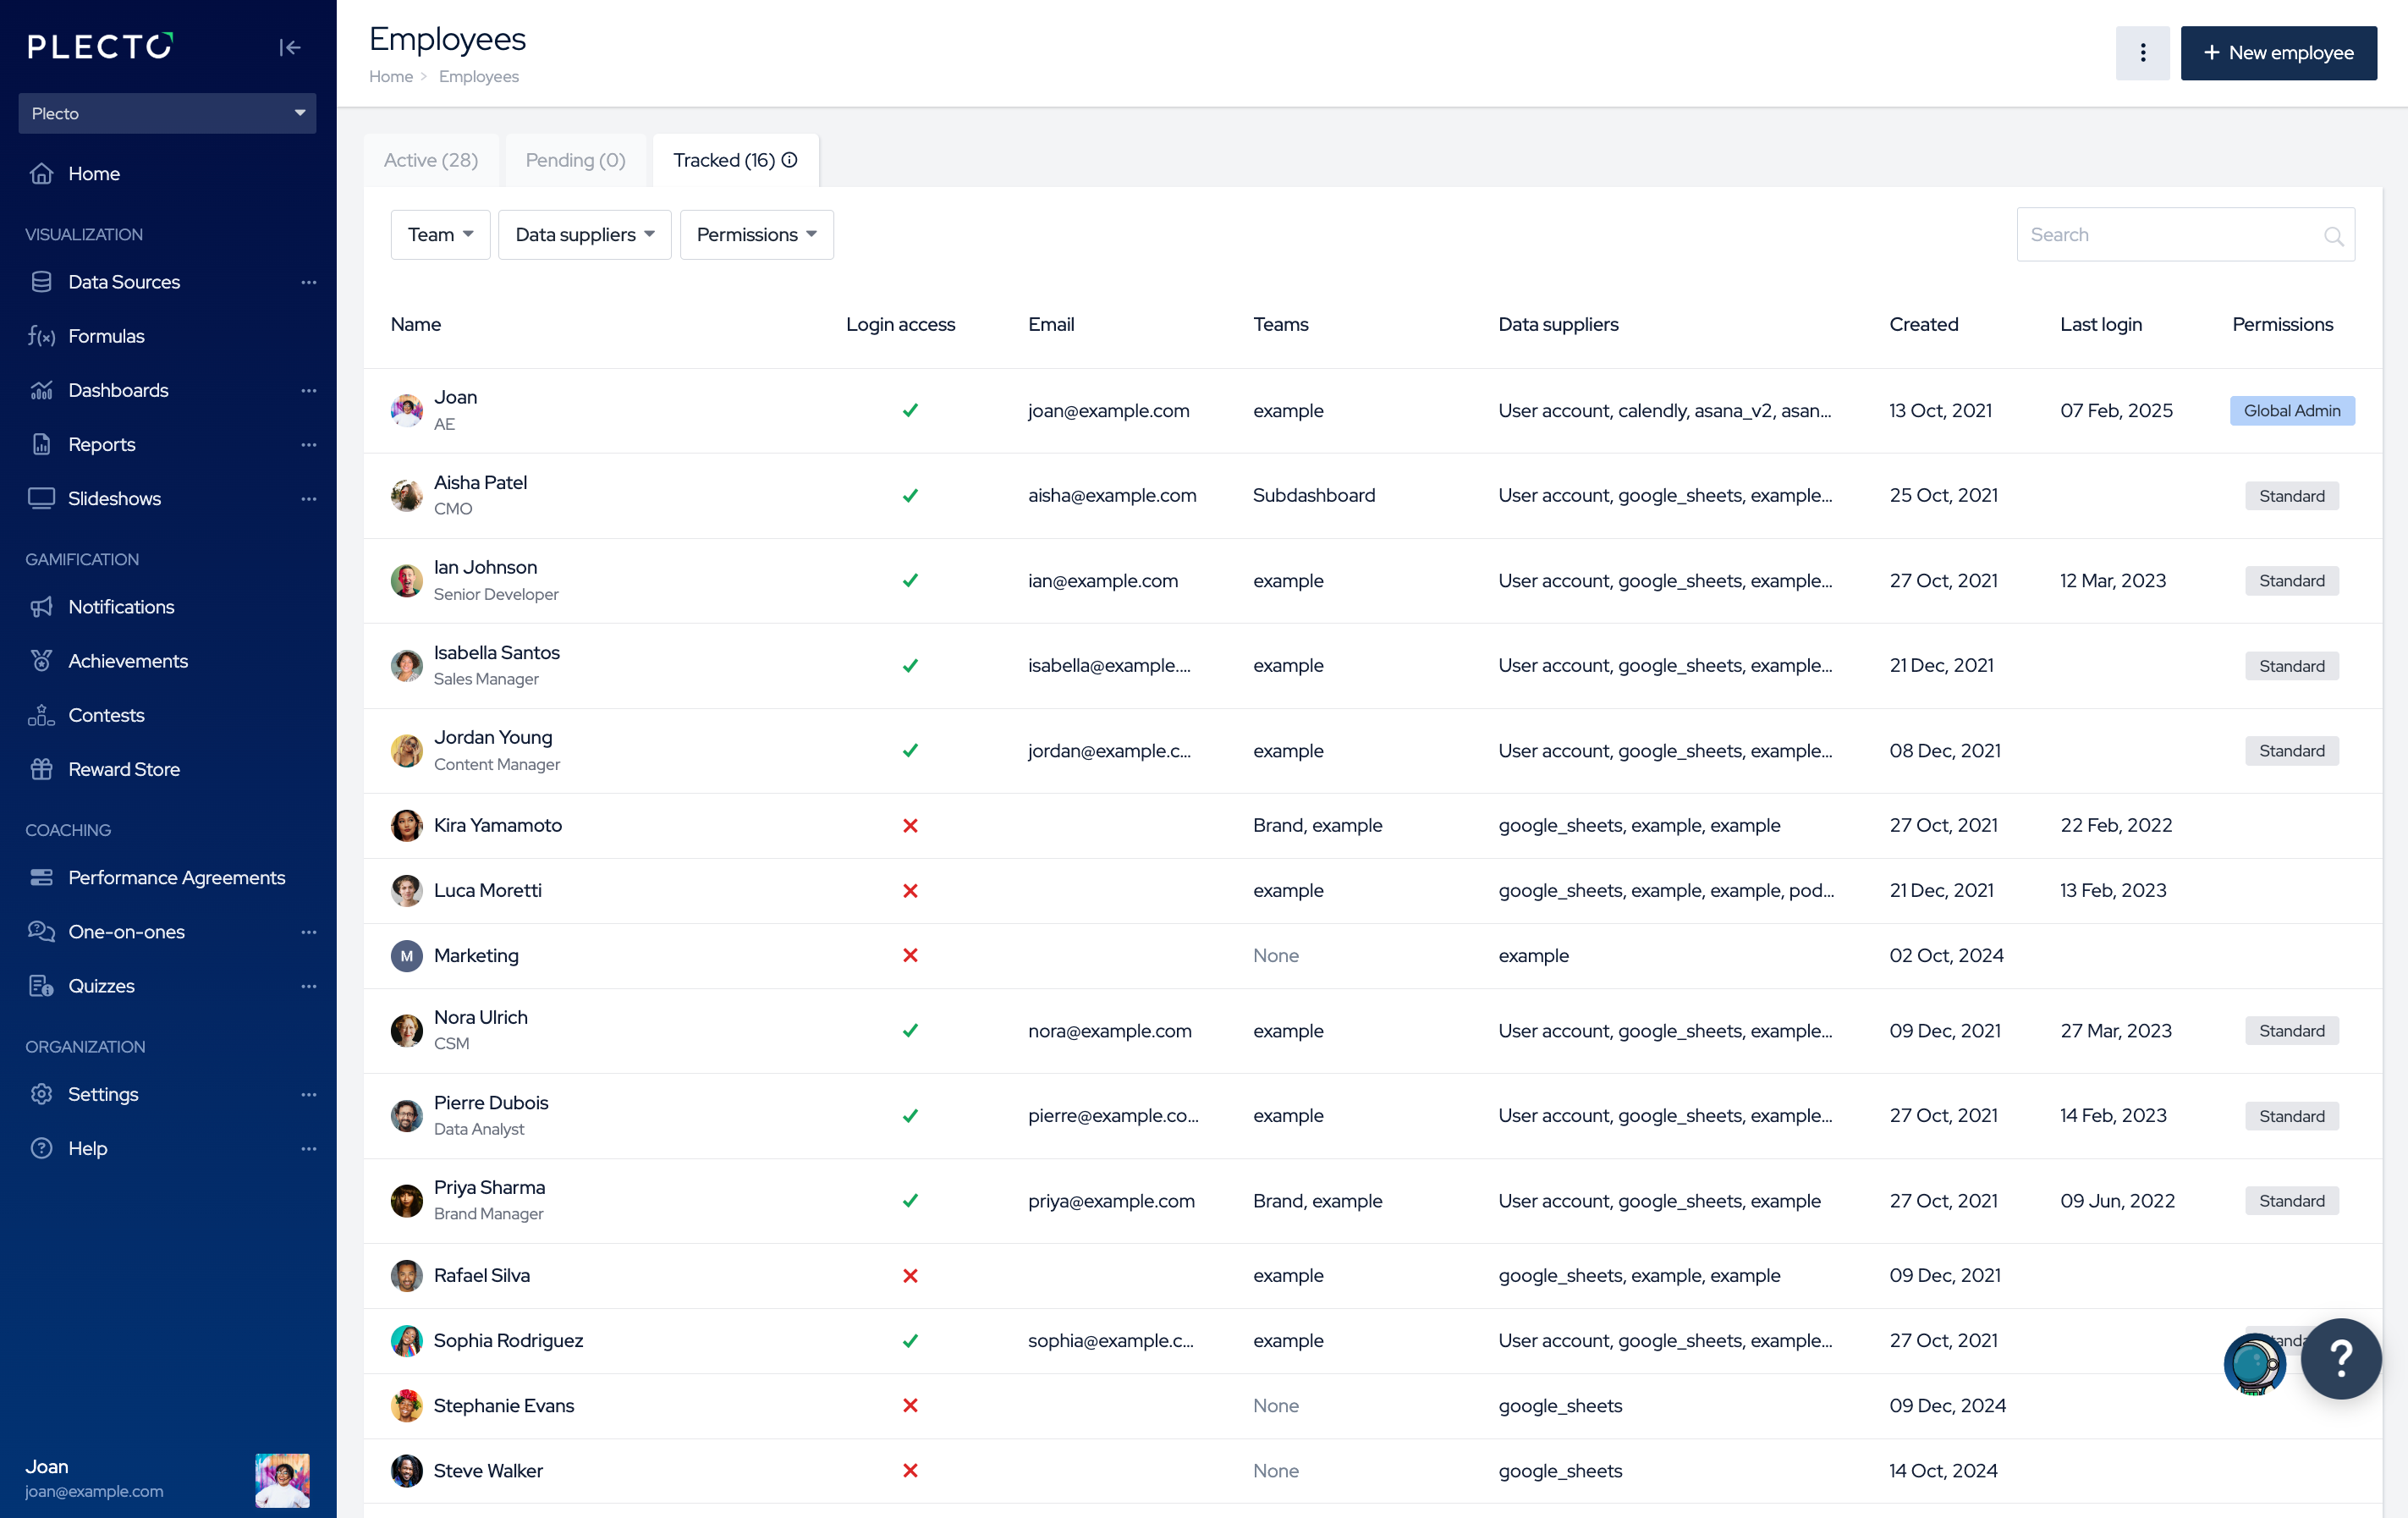
Go to Settings > Employees.
-
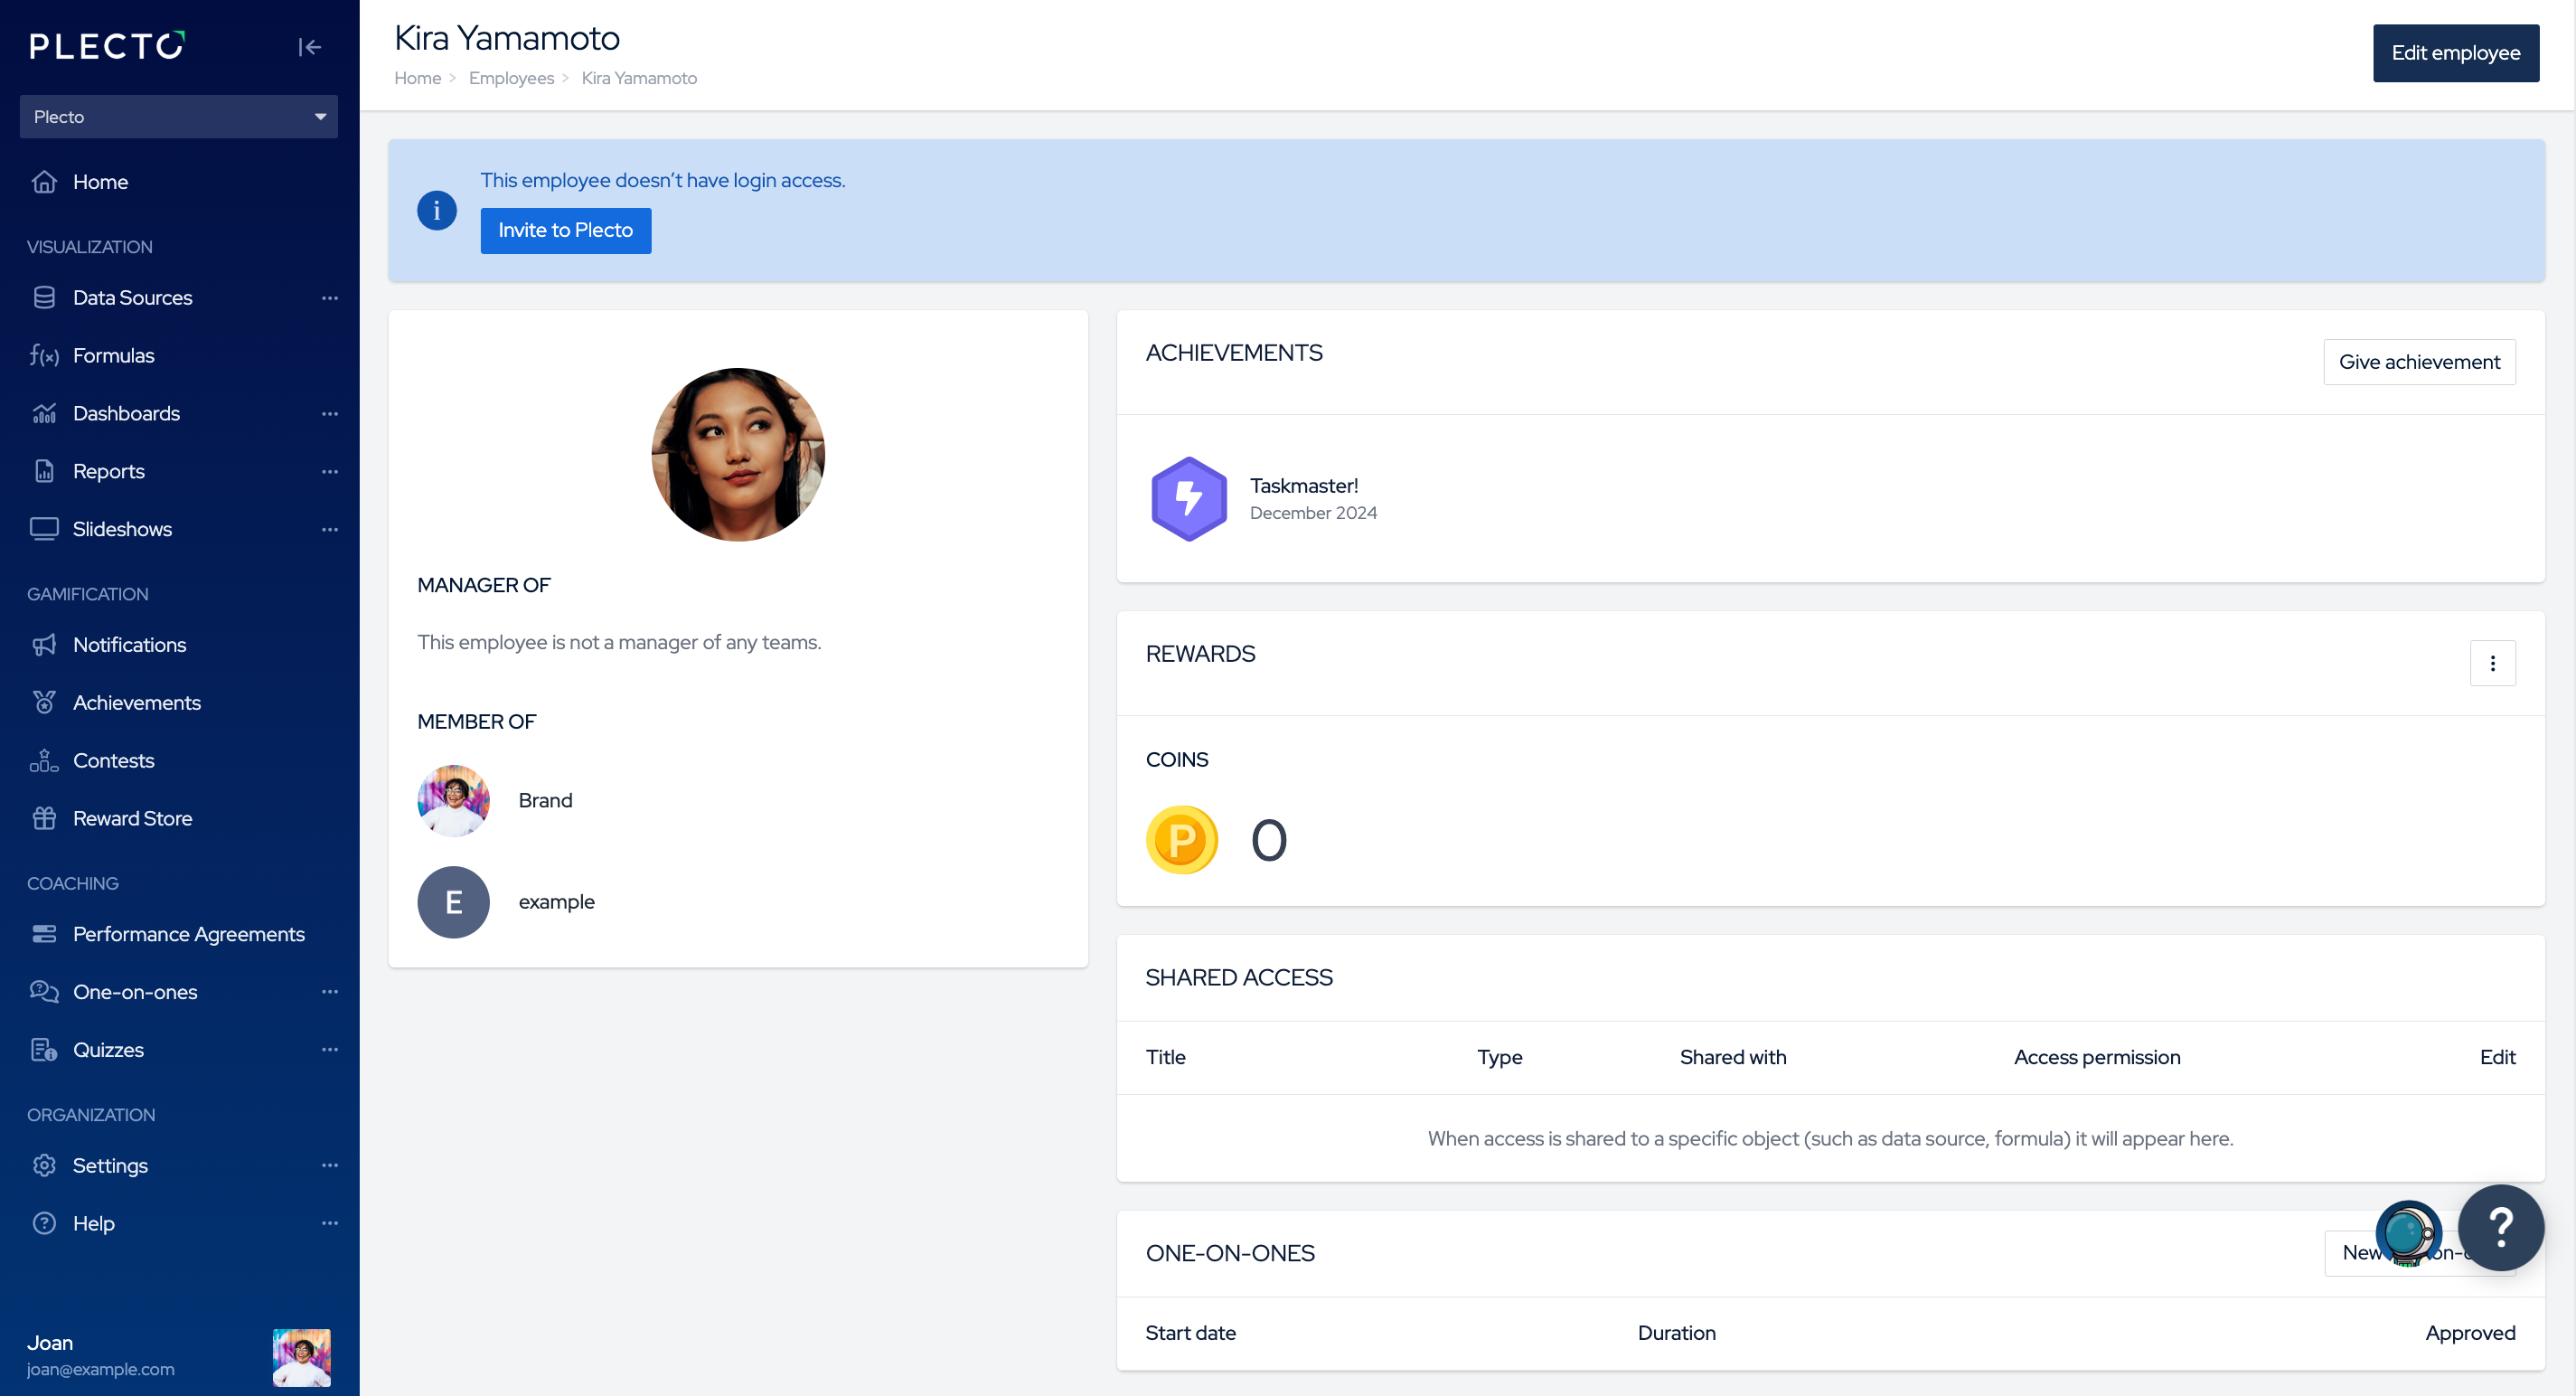
If you previously connected Plecto to an external system, you might see some employees that don't have login access to Plecto.
-
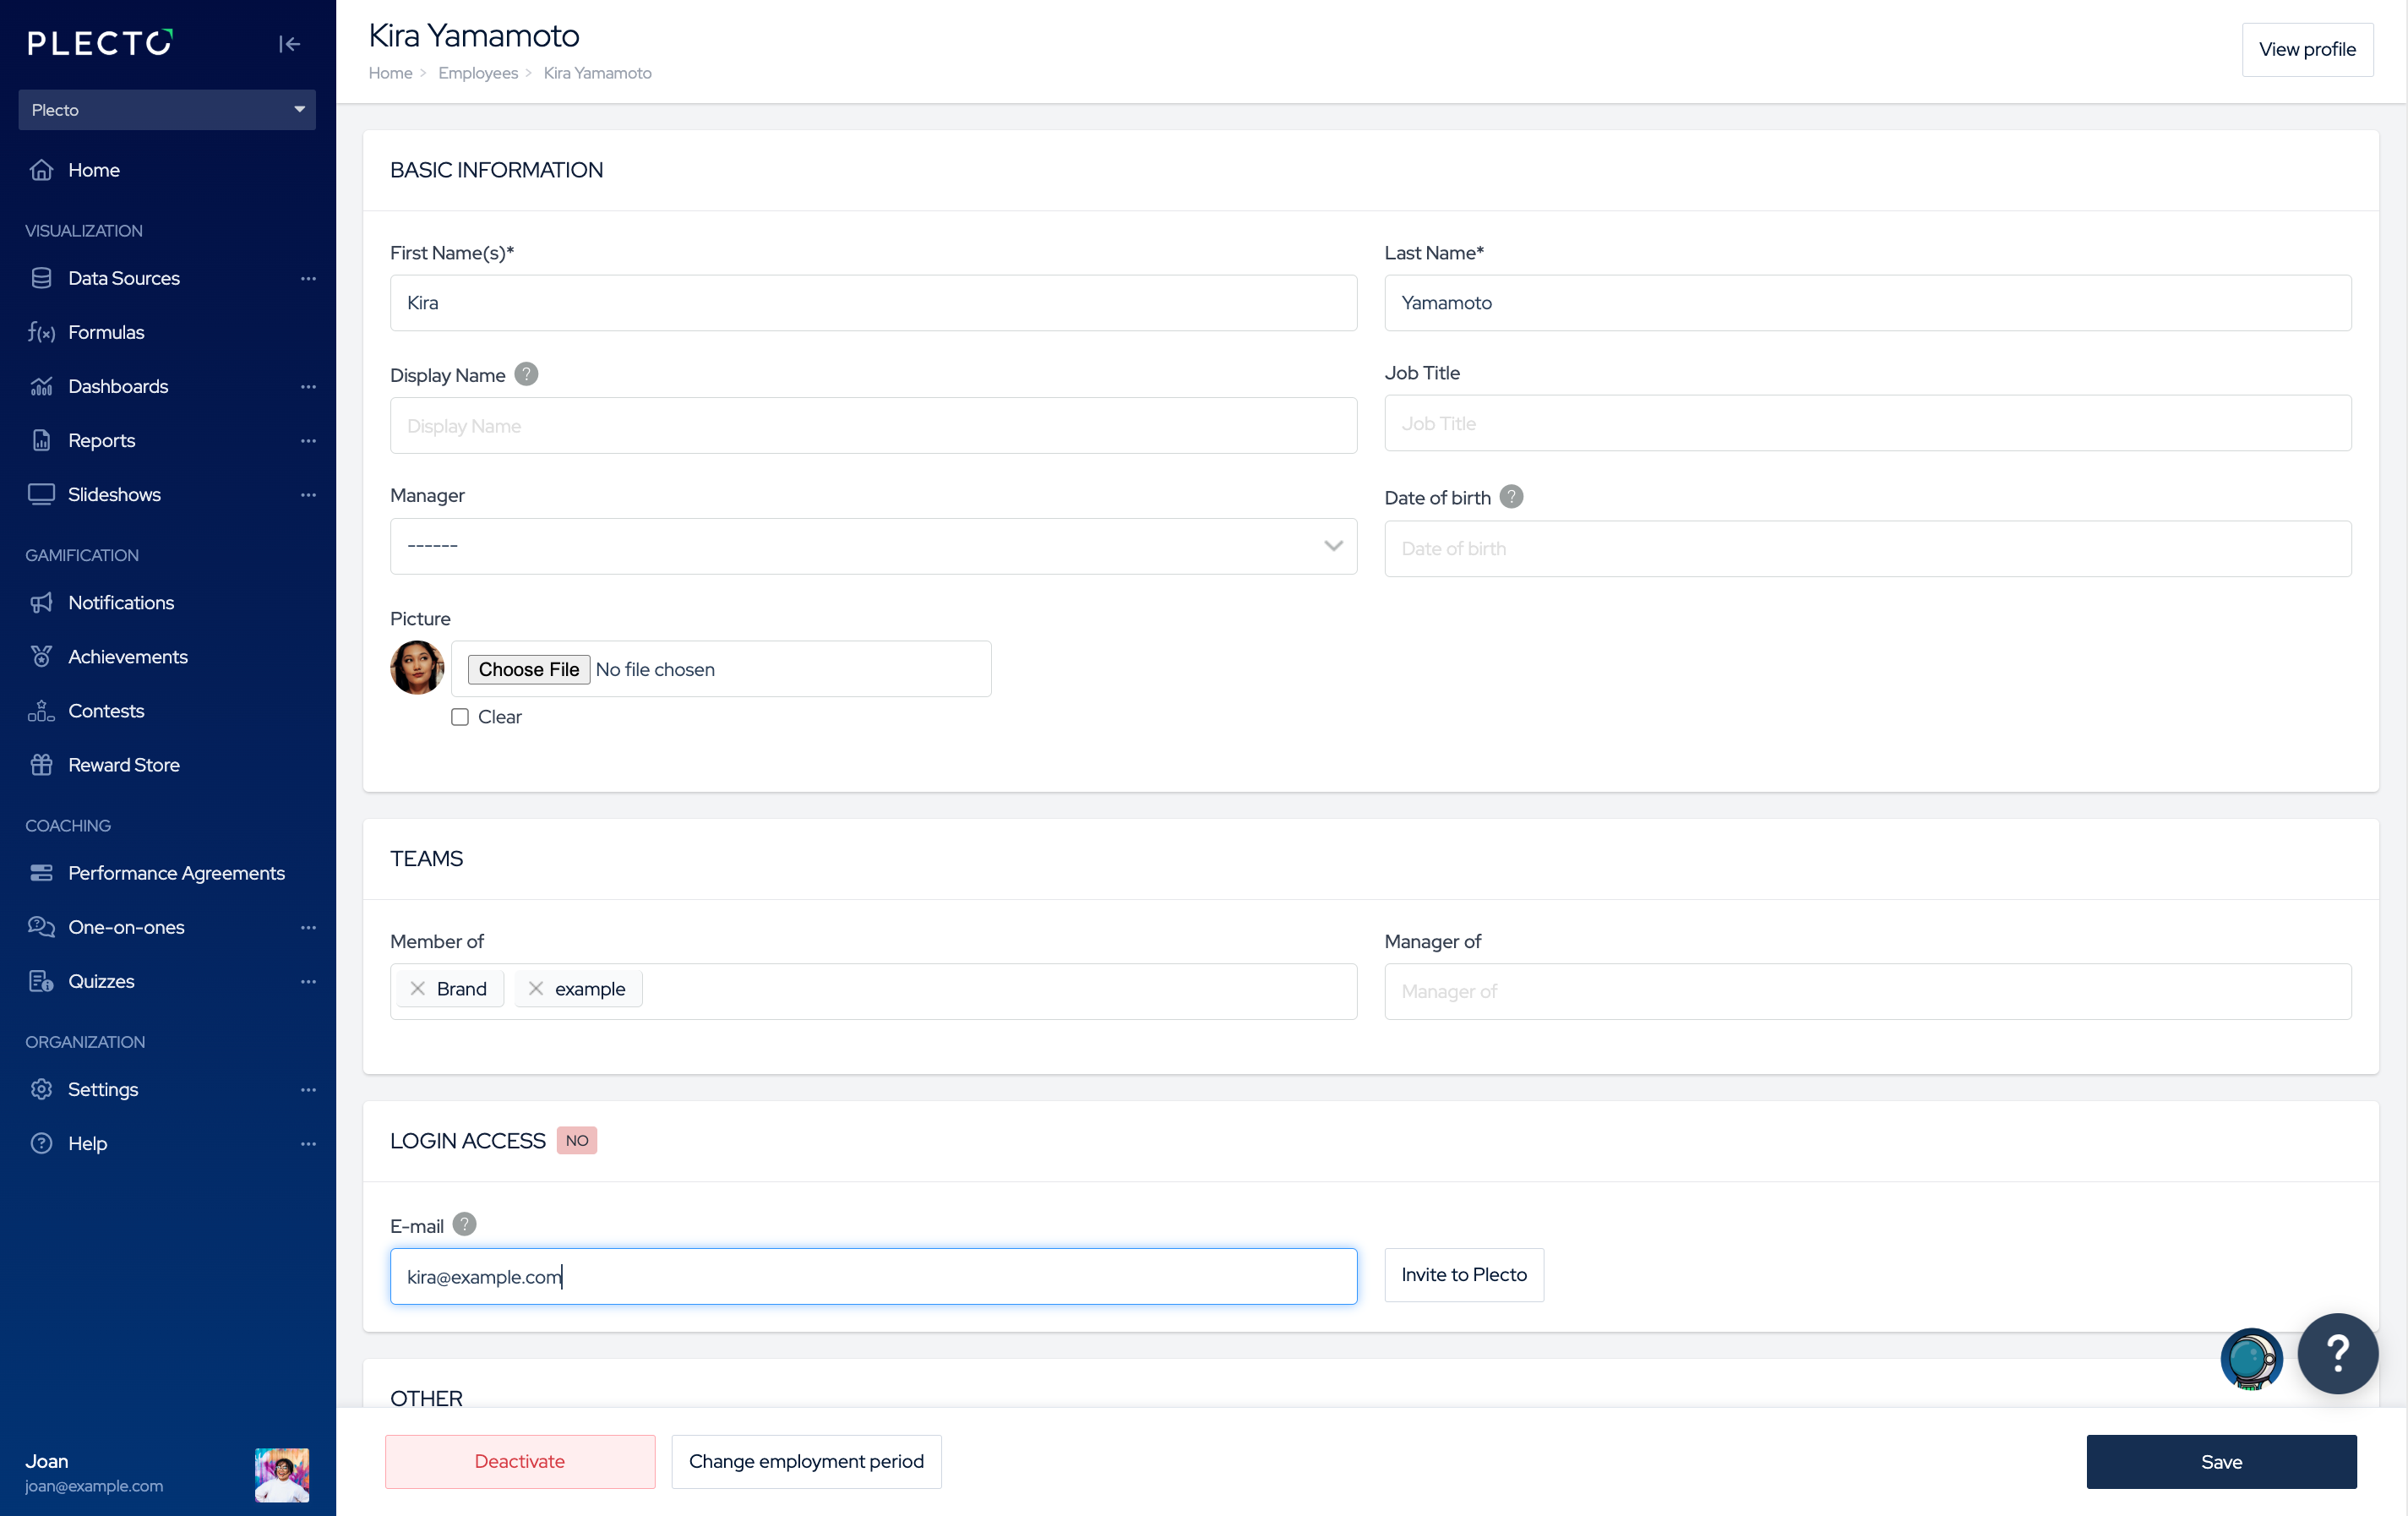
Click on the employee profile, then click Invite to Plecto at the top of the page.
-
Under Login access, enter the employee's work email and click Invite to Plecto. The employee will receive an email and will have to set a password for their account. Once they log in, they will use the default permission profile of your organization.
The usual default is the Standard permission profile which gives read access to most features. Unless you have changed the permission settings, Standard will be the appointed permission of all new users.
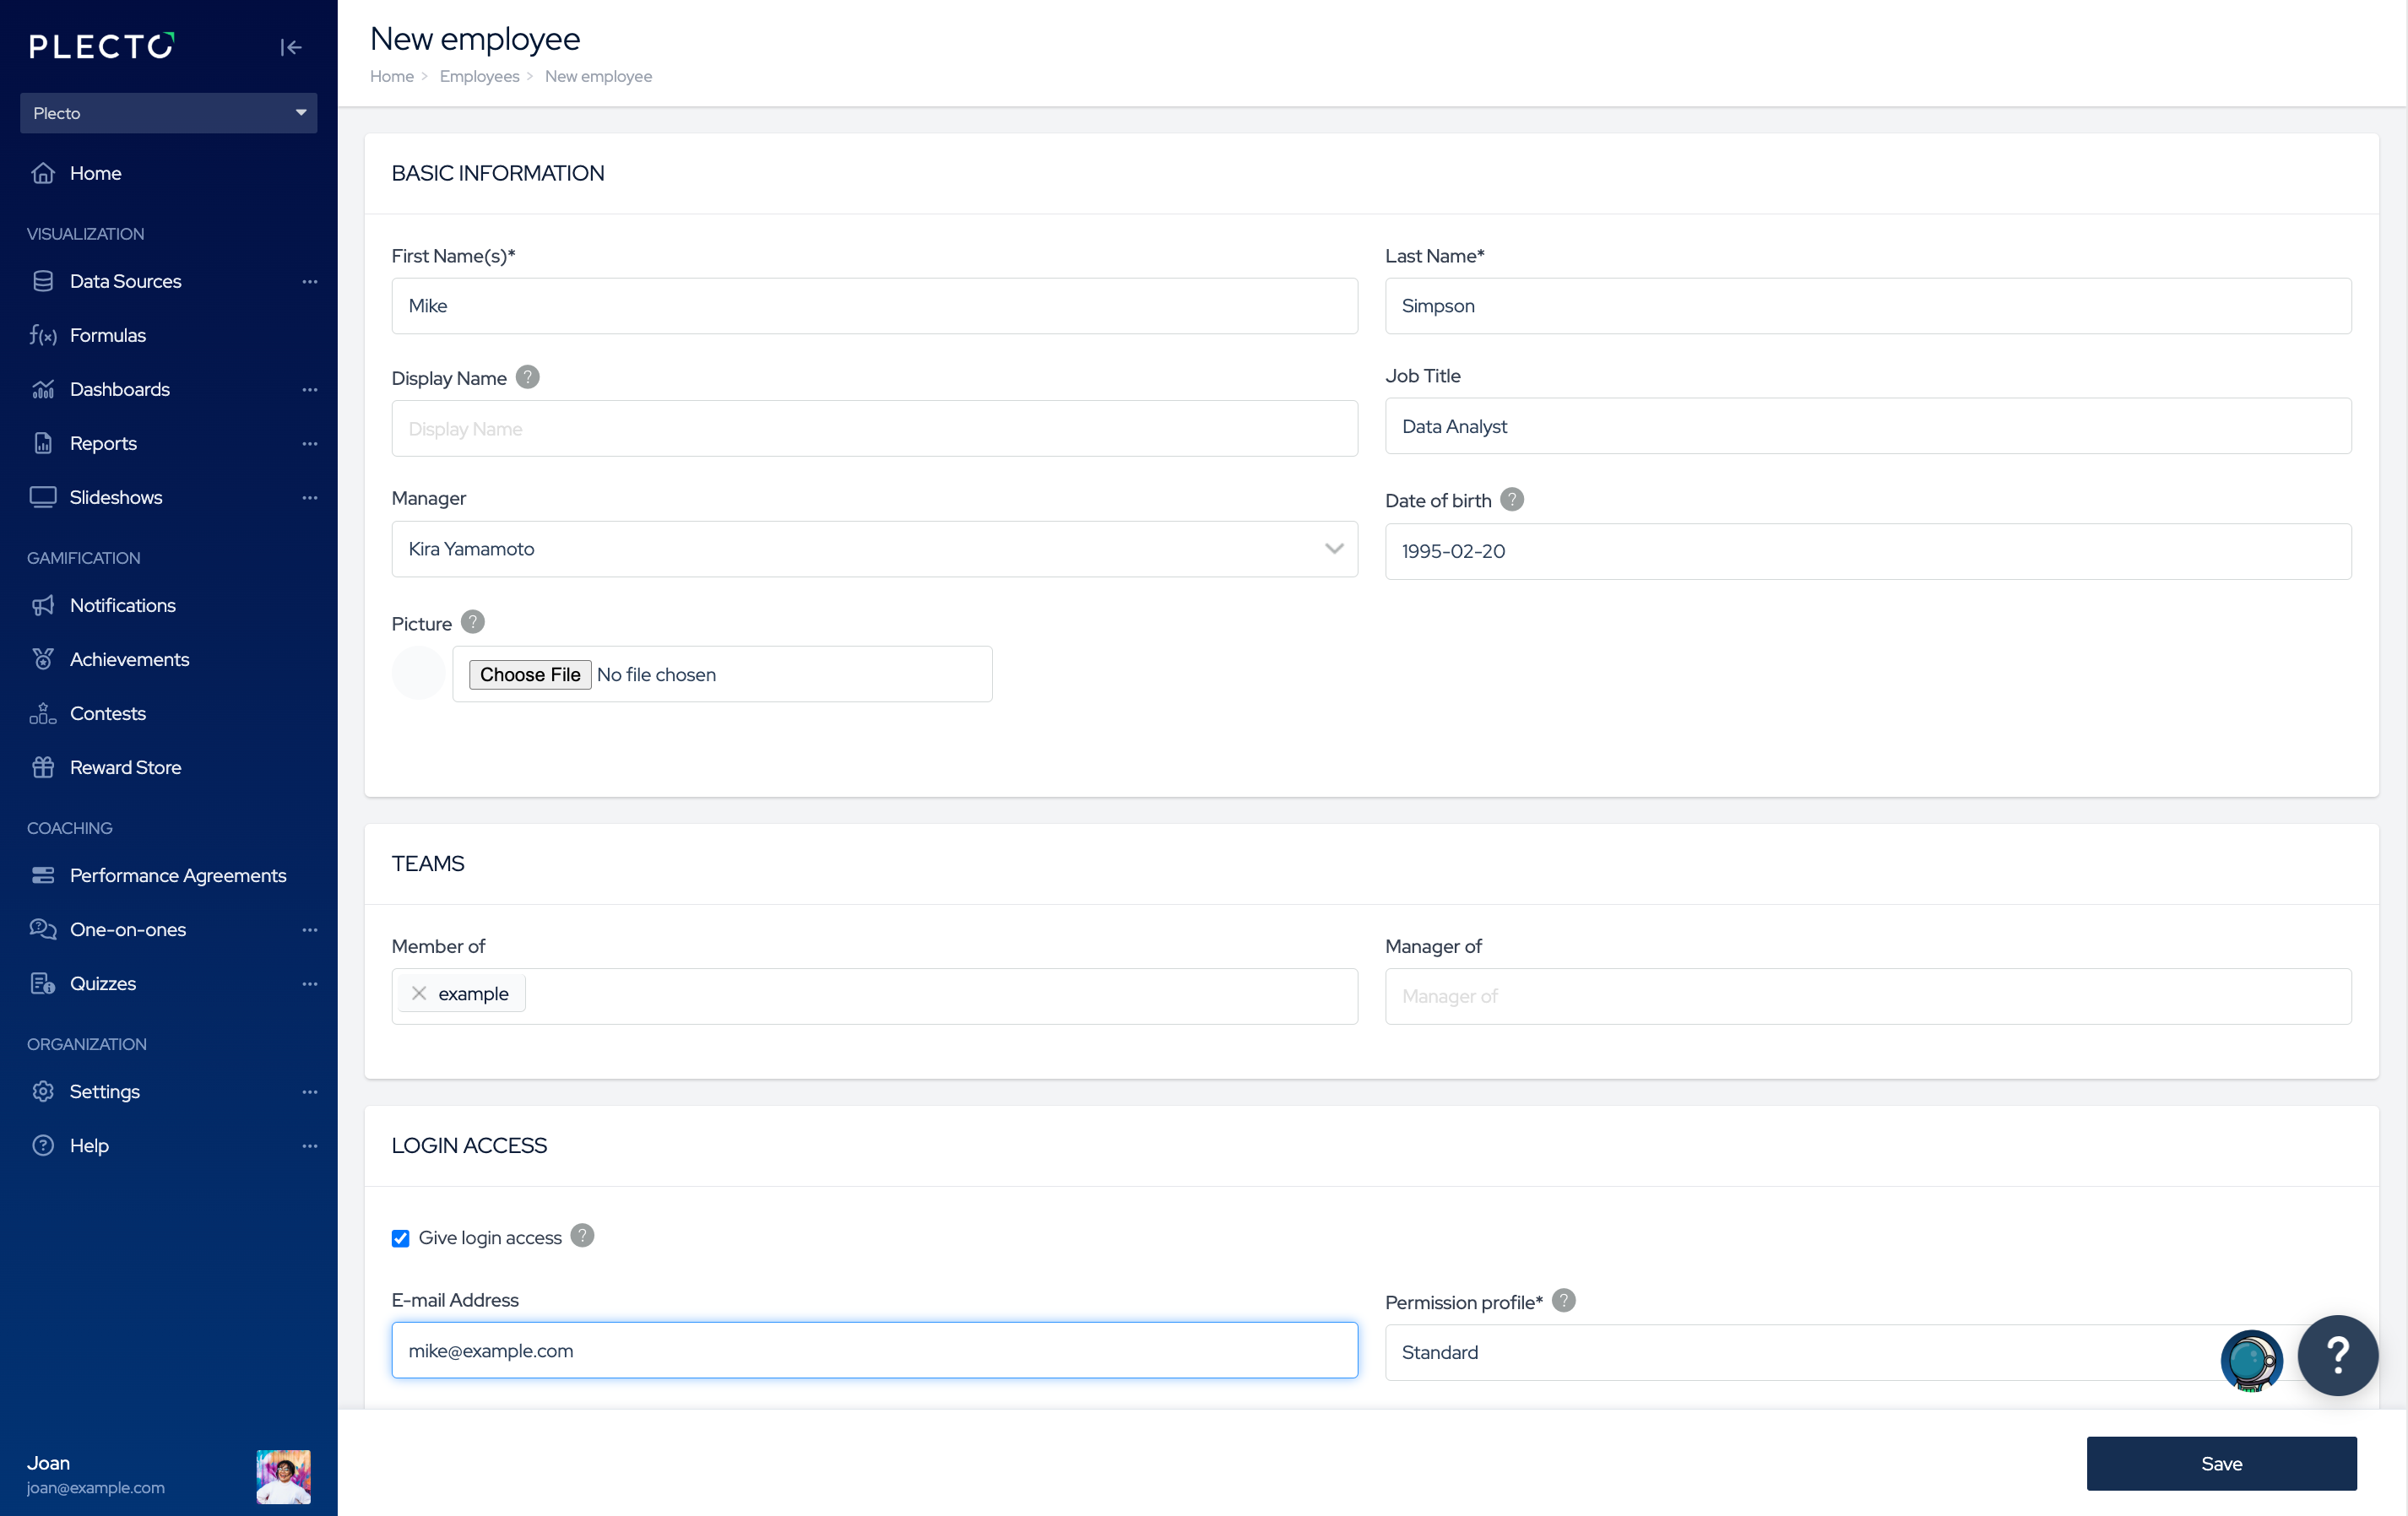
How to create an employee profile manually
-
Go to Settings > Employees > New employee.
-
Fill out their personal and team information.
-
(Optional) Give the employee login access. Having login access to Plecto doesn't cost anything - an employee profile counts as a billable license only when they register data into Plecto or send it via external systems.
-
Enter the employee's work email and select a permission profile under Login access. You can choose what kind of access your employees get by assigning them to a permission profile.
-
Click Save to create the employee. They will receive an email with the login details.
The usual default is the Standard permission profile which gives read access to most features. Unless you have changed the permission settings, Standard will be the appointed permission of all new users.